Ring
下載與安裝
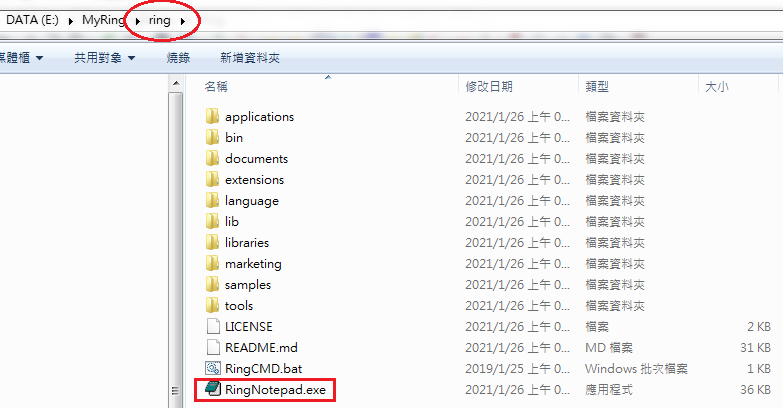
首先到官網(https://ring-lang.github.io/)首頁,點擊Download,出現如下畫面: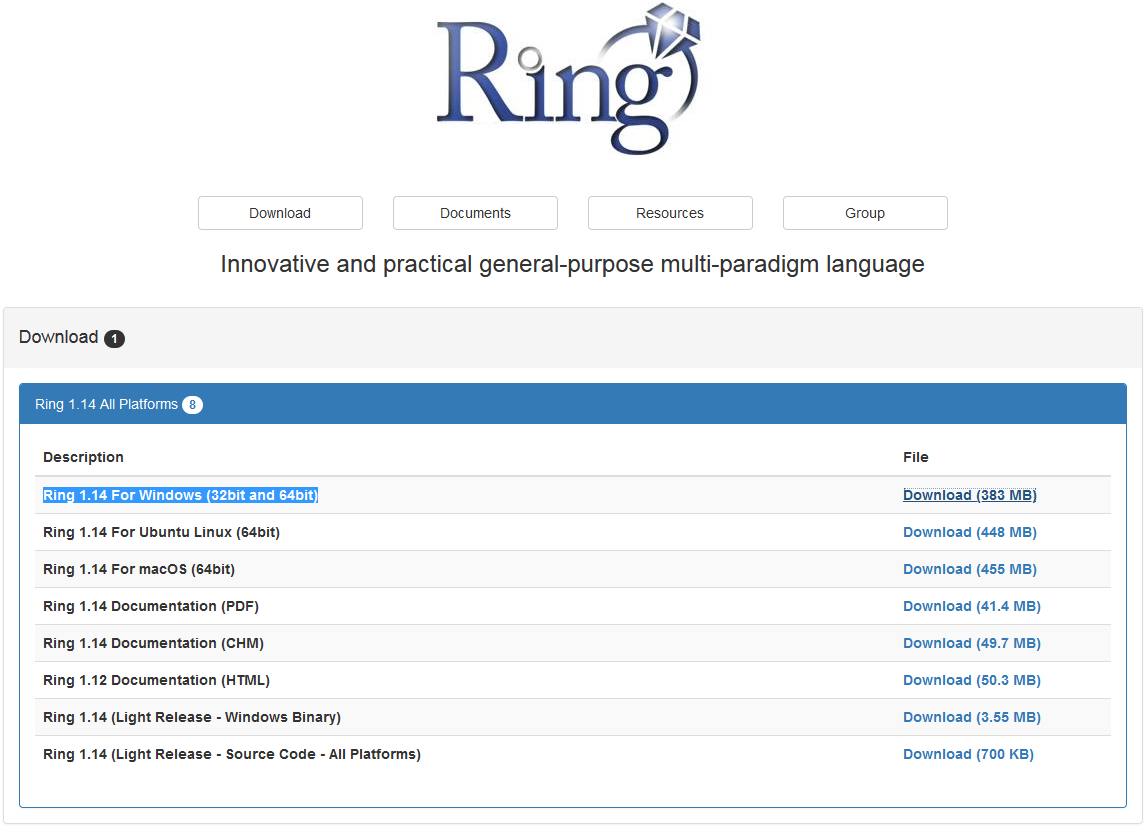 選擇適合你的作業環境的檔案下載。例如使用Windows就下載Ring 1.14 For Windows (32bit and 64bit)。執行下載後的檔案,選擇你想要安裝的路徑(e.g. c:\ring),然後進行安裝。經過一番枯燥的檔案萃取,終於安裝完成,進入到該資料夾,找到RingNotepad.exe,雙擊執行。
 之後出現
之後出現
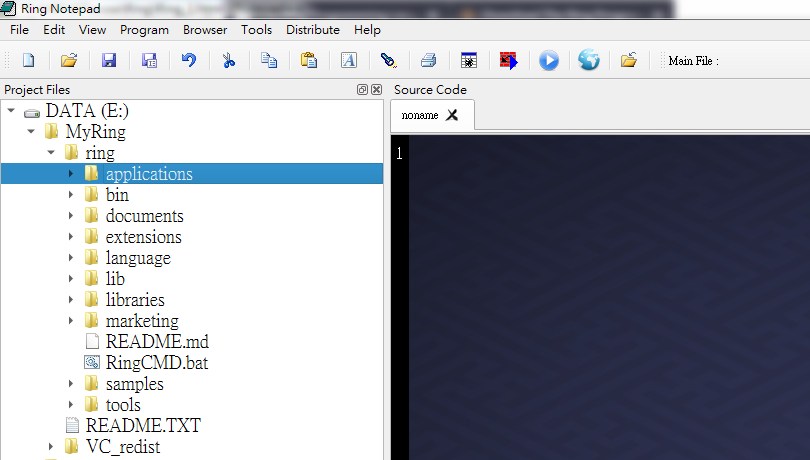 這即是我們要使用的IDE。
基本操作
先熟悉一下。首先建立一個資料夾(e.g. C:\ring\codes)來儲存程式碼檔案,建立一個延伸檔名為ring的檔案(e.g. Hello.ring,也可以直接save as原來的noname檔案)。不免俗地來顯示一下Hello World!,輸入以下指令: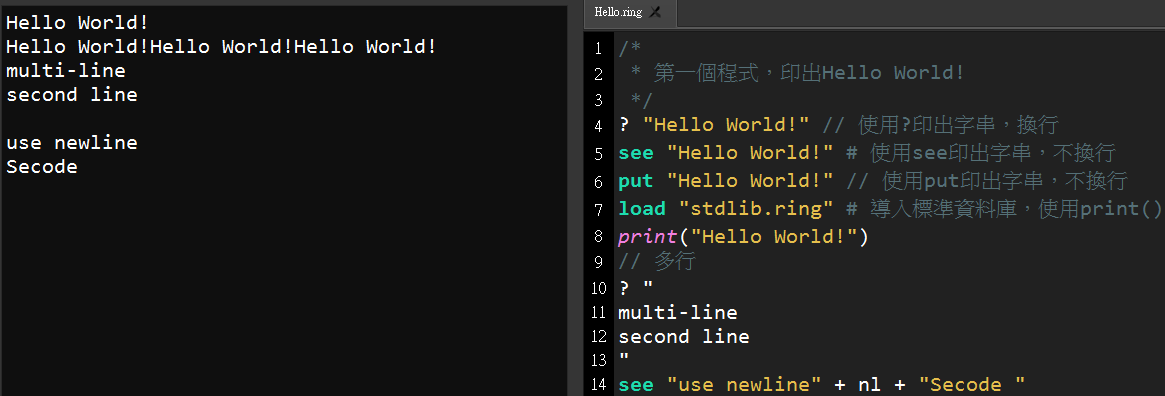 你可以在下拉選單中選擇Program>Run GUI Application(No Console),或是點擊快捷鍵,或是按Ctrl+F5。
這裡可以先學會幾件事,
你可以在下拉選單中選擇Program>Run GUI Application(No Console),或是點擊快捷鍵,或是按Ctrl+F5。
這裡可以先學會幾件事,
- ?、see、 put都可以顯示字串,若要使用print(),需先導入stdlib.ring模組
- #、//皆可做單行註解,多行註解使用/* */
- 我們可以使用其中一種,也可以在不同情況交互使用不同語法
- 關鍵字語法無大小寫限制
- 可以直接顯示多行字串或使用nl換行(使用+號連結字串與newline符號)
在底下的Input輸入欄中輸入然後按send。
變數與資料型態
Ring的基本變數型態為numbers, strings, objects, and lists。宣告時無須指定變數型態。numbers:包含整數、實數。
a~e都是數字。
strings:使用雙引號包括的為字串。
- "10"為字串,若是數字+字串(e.g. 10+"10")或字串+數字(e.g. "10"+10),則型態與第一個相同。
objects:之後再提。
lists:先簡單介紹。
- "a":"f"或1:10可直接建立序列的list
- 兩個list相加,原則上後面的變為前一個的最後一個元素
- 使用len()函數來取得list長度
好像少了boolean,原則上初始值true=1,false=0。
- true跟false為兩變數,true的預設值為1,原則上不等於0的皆為true
- Ring允許你改變true跟false的值,不過隨便改變可能造成整個程式的大錯亂,宜慎之
在Ring中,null的涵義如下:
- 空字串與字串"null"為null
- 可以使用isNull()來判斷是否為null
- null為變數,表示其值可改,again,最好別亂改
使用以下函數來確認變數型態: type()、isString()、isNumber、isList()、isNull()。
此外還可以使用官網中(https://ring-lang.sourceforge.io/doc1.10/checkandconvert.html)羅列的函數來確認資料內容,可以自己練習看看,之後若有機會用到再介紹。
若欲將某變數型態改變為另一型態,使用以下函數:number()、string()、ascii()、char()、hex()、dec()、str2hex()、hex2str()。
命名
命名的慣例在各個語言中大多類似,在此不再贅述。運算子
Ring的運算子與其他許多語言多有類似,以下僅做簡單解釋:- Arithmetic Operators:
+ - * / % ++ -- - Relational Operators:注意判斷相等是用=而非==。
= != > < >= <= - Logical Operators:
and && or || ! not - Bitwise Operators:
& | ^ ~ << >> - Assignment Operators:
= += -= *= /= %= <<= >>= &= |= ^=
運算優先順序
| Operator |
|---|
| .[](){} |
| - ~ :Literal [list items] |
| ++ -- |
| Start:End |
| * / % |
| + - |
| << >> |
| & |
| | ^ |
| < > <= >= |
| = != |
| not ! |
| and or && || |
| Assignment = += -= *= /= %= >>= <<= &= ^= |= |
| ? |
Control Flow
if statement
Ring的條件式,可以有如下寫法:I: if...but...else...ok
II: if...elseif...else...ok
III: if {}
- I與II的分別是可以使用but替代elseif。
- III與前兩者之分別是使用{}可以省略ok(二擇一使用)。
switch
switch跟if else作用類似,一樣有三種寫法:I: switch...on...other...off
II: switch...case...else...end
III: switch{}
while loop
Loop一樣分while loop與for loop,不囉嗦,直接看例子學語法:I: while...end
II: while{}
好像只有兩種寫法。
for loop
試試看for loopI: for...next
II: for...end
III: for{}
exit
已知exit可以用來離開loop,尚可以使用exit 2來離開兩層nested的loop,例如:
do...again
原則上跟其他語言的do...while相同,先執行一次再判斷,可保證至少執行一次
loop
loop就是continue,直接看例子。
函數(function)
函數應該不陌生,來看Ring的寫法:I: func
II: def...[end]
III:func[{}]
main function
可有可無的函數,應該是保留C語言的習慣,可用作收納整理程式碼
input value
關於函數的輸入,我們先看以下的例子:這個例子我們可以學到幾點:
- 函數的變數可以使用小括號()括起來。
- 函數需要三個變數,我們就得傳入三個,即使c的值是空,還是得傳入null,否則出現錯誤。
- 在list內的值前面給特定名稱(名稱須以:開頭),之後可以使用此名稱來取得對應的值,而不需要使用index,類似python中的dict。
- 此時傳入函數之個數不足三個並不會產生錯誤。
Variable scope
變數定義位置關係其影響範圍,全域可用稱全域變數(global varialbe),僅影響部分區域稱區域變數(local variable)關於在loop內的變數,再看個例子:
由例子中可以看出global variable i的值並不被函數內的i影響。但是之前的例子,不是在函數後印i會得到函數內的區域變數的值嗎?此處談一下Ring的程式架構,原則上我們的程式架構為最上方應該是load(Load Files),然後是程式碼(Statements and Global Variables,也可以放在main這個函數內),接下來是函數(Functions),最後是包裹及物件(Packages and Classes)。也就是說,我們不應在函數之後放置主程式碼,所以也不會有之前例子產生的情形。
Pure function
Pure function簡單的說是函數並不使用外部變數,所有操作都純粹包含在函數內。看個例子:原則上原來的lista被改變了,而且使用了globle varialbe,呼叫square()所傳回的list可以是一個新的list,如下:
- 此處的重點是使用alist = arg來取得外部的變數做內部使用,而不會與外部資訊相互影響。
- 在Ring中,=表示的是deep copy,亦即複製資料至另一塊獨立的記憶體(傳入函數的list或object參數預設為傳址而非傳值)。例如:
- ori = [1,"k":"r",2,['a','b','c'],3]
- copyed = ori # Deep copy
- copyed[2][1] = "A"
- ? copyed # copyed中的k變成了A
- ? ori # 保持原資料內容不變
First-class function
在Ring中,函數是第一級的居民。我們可以將其存為一個變數,也可以當作另一個函數的輸入或傳回值。
High-order function
High-order function可將其他函數當作輸入引數。一個無聊的程式,將成績開根號乘以10,一個函數開根號,一個將此函數作為輸入,將得到的值乘以10。
Anonymous Functions
無名函數,類似lambda,無須命名,如前所述,可將函數儲存於一變數中。需先定義函數,再在之後call(需使用call關鍵字來執行)。
anonymous function做為另一個函數的輸入值。
Nested Functions
函數之內有函數。
Fabricating Functions
我們可以藉由使用者輸入來改變函數內容,舉例如下:解釋一下eval()函數,此函數可以讓我們在程式進行時(runtime)執行一段程式碼(字串表示)。例如:
系統函數
Ring內建的系統函數。陣列(List)
List是Ring中的基本資料型態,之前已有用過,在此再做點介紹。建立list。複習一下,我們已經知道可以使用以下方法建立list。
也可以使用list()函數來建立陣列
list內的元素存取其實沒甚麼好說的,主要要注意的是在Ring中,index是由1開始起算的。
加入元素。
- len()可用來求得list長度。
- insert(list, pos, ele)若pos為len(list)則相當於add(list, ele)。簡單的種樹問題,兩棵樹有三個空缺,空缺的編號(pos)正好為0~len(list)。
刪除元素。
沒甚麼好說的,就是使用del()函數。若是要刪除list內所有元素,可以如下:
事實上更簡單的方式為:
搜尋list。使用find()或BinarySearch()函數。
Reverse & Sort。
Access List Items by String Index: 之前提過的,原則上就是dict in Python。
字串(String)
這裡介紹一些關於字串的操作。建立字串。用""、''、``都可以。
len()、lower()、upper()、取得修改字母:原則上與list操作相同
substring: trim()、left()、right()、substr()
copy()、lines()
strcmp():比較兩個字串
str2list()、list2str(): 字串與list轉換。注意str2list產生的list中的元素為原str中的一行(非一個字元)。
數學函數與日期時間
Ring提供數學函數供使用,應該沒甚麼好說明的,僅表列如下。可參考官網之說明。| Function | Description |
|---|---|
| sin(x) | Returns the sine of an angle of x radians |
| cos(x) | Returns the cosine of an angle of x radians |
| tan(x) | Returns the tangent of an angle of x radians |
| asin(x) | Returns the principal value of the arc sine of x, expressed in radians |
| acos(x) | Returns the principal value of the arc cosine of x, expressed in radians |
| atan(x) | Returns the principal value of the arc tangent of x, expressed in radians |
| atan2(y,x) | Returns the principal arc tangent of y/x, in the interval [-pi,+pi] radians |
| sinh(x) | Returns the hyperbolic sine of x radians |
| cosh(x) | Returns the hyperbolic cosine of x radians |
| tanh(x) | Returns the hyperbolic tangent of x radians |
| exp(x) | Returns the value of e raised to the xth power |
| log(x) | Returns the natural logarithm of x (the base of e) |
| log(x,b) | Returns the logarithm of x to the base of b |
| log10(x) | Returns the common logarithm (base-10 logarithm) of x |
| ceil(x) | Returns the smallest integer value greater than or equal to x |
| floor(x) | Returns the largest integer value less than or equal to x |
| fabs(x) | Returns the absolute value of x. |
| pow(x,y) | Returns x raised to the power of y |
| sqrt(x) | Returns the square root of x |
| random(x) | Returns a random number in the range [0,x] |
| srandom(x) | Initialize random number generator |
| unsigned(n,n,c) | Perform operation using unsigned numbers |
| decimals(n) | Determine the decimals digits after the point in float/double numbers |
日期時間
直接練習下例。
timelist每個元素的對應資訊:
| index | value |
|---|---|
| 1 | abbreviated weekday name |
| 2 | full weekday name |
| 3 | abbreviated month name |
| 4 | full month name |
| 5 | Date & Time |
| 6 | Day of the month |
| 7 | Hour (24) |
| 8 | Hour (12) |
| 9 | Day of the year |
| 10 | Month of the year |
| 11 | Minutes after hour |
| 12 | AM or PM |
| 13 | Seconds after the hour |
| 14 | Week of the year (sun-sat) |
| 15 | day of the week |
| 16 | date |
| 17 | time |
| 18 | year of the century |
| 19 | year |
| 20 | time zone |
| 21 | percent sign |
物件
Ring當然也可以建立物件,此處期待你已有物件之概念,不多贅述,直接看做法。第I種寫法:
第II種寫法:
第III種寫法:
範例:包含使用setters&getters,private attributes&methods,composition(使用另一個物件作為一個物件的attribute)
override operator這個method來定義符號,需要兩個物件作為輸入參數。下例僅供練習,因為+、-、*、/會傳回新的物件,而>與<則會傳回boolean,不是一個很好的設計。
Inheritance:繼承使用關鍵字from
Package: 可以將所有的class放在一個package內,只要使用package關鍵字並定義名稱即可。如此可以較容易收納。好像無法直接在package內定義函數,不過我們可以如例中將函數收納在一個class內,然後使用時再呼叫。
每次要使用package內的class,都要在之前加上package的名稱,為了簡化,可以先使用import將package導入,然後便可直接使用了。以下修改上例中package之前的程式碼。
簡化了許多。
當我們要處理好幾個instances時,可以將這些instances放在一個list(collection)內,因為可能要對於這個list做一些操作,所以做法可以在建立一個class,讓此list作為物件變數,然後建立物件方法來操作它(也可參考java或python之資料結構做法)。此外,此例中也介紹了sort()與find()函數。
self & this
self主要是要避免跟globle variable的名稱衝突,事實上並不見得需要使用。那麼this呢?
也可以用this替代self。
Note: 原則上Ring的語法不太需要使用self&this。
IO
簡單的輸出入例如see、give、put、get等不再贅述。使用load:把需要的函數及class寫在一個檔案內(e.g. fun.ring),在主程式使用load關鍵字來導入即可使用。例如:
如果fun.ring內的classes是定義在一個package內(e.g. package fun.classes),那再使用時可以在load之後import這個package即可使用。
我們可以load超過一個檔案,不過當兩個檔案中有同名的函數(或物件),則會產生錯誤。不像其他語言(例如python)可以定義Name space,使用Ring時設計名稱不要重複即可。
Files:此處簡單介紹一些常見的檔案操作,其他詳細的函數列表請參考官網。
-
在Ring中檔案的操作,最簡單的讀寫可以很容易地達成,如下:
- write("abc.txt", "A string to write.") # write(filename, string)直接寫入檔案,若無該檔案會自動產生
- see read("abc.txt") # read(filename)直接讀取內容(string)出來,可以讀取binary file(e.g. read("fun.ring")
- 直接使用write()雖然方便,不過若是要append便無法控制,所以也可以使用如下方式寫入:
- # 先使用fopen()函數開啟檔案資料流,第二個參數可以選擇r, w, a, r+(r/w), w+(r/w), a+(r/a)
- f = fopen("abc.txt", "a")
- fwrite(f, NL+"something new") # 使用fwrite()寫入
- fclose(f) # 使用fclose()關閉檔案資料流
- 可以使用fread(file handle, nSize)來讀取檔案內容,可以控制讀取的大小(nSize)。
- f = fopen("abc.txt", "r")
- r = fread(f, 100) # 讀取內容,第二個參數是size
- see r+NL
- fclose(f)
- 如果要得到逐行的資料作進一步分析,可以先使用read()讀進,再使用str2list()函數取得各行資料即可。
- if fexists("abc.txt") ## 確認該檔案確實存在
- s = read("abc.txt") # 讀取檔案所有資料
- alist = str2list(s) # 將字串轉為list
- ? len(alist) # 行數
- ? alist[1] # 第一行資料
- else
- ? "abc.txt is not existed."
- ok
- 一些關於檔案的操作:
- d = "E:\your\target\directory" # 你的目標資料夾路徑
- if direxists(d) # 檢查此資料夾是否存在
- filelist=dir(d) # 取得資料夾內所有檔案及資料夾資訊
- else
- ? "No such directory"
- ok
- for x in filelist # x包含兩個資訊,x[1]>檔案名,x[2]>型態(0=file, 1=folder)
- if x[2] # 如果x[2]為1(true),表示是folder
- see "Directory: " + x[1] + NL
- else # 表示是檔案
- see "File: " + x[1] + NL
- ok
- next
- see "Files = " + len(mylist)
- # rename(oldFileName, newFileName)
- rename("abc.txt","xyz.txt") # 將檔案改名
- # remove(delete) file
- remove("xyz.txt") # 刪除檔案