1. 如何使用CSS?
CSS 的全名為 Cascading Style Sheets,是一種樣式表 (Stylesheet) 語言,可協助我們設計網頁。 設計時可使用各種文書編輯器例如NotePad, NotePad++, TextPad等。要如何使用呢?先看以下的html程式碼。<!DOCTYPE html> <html> <head> <title> </title> </head> <body> </body> </html>
首先可以在行內套用(Inline style sheet),使用關鍵字style。例如在body內寫:
<p style="color:red">紅色字體</p>
紅色字體
第二個方式為嵌入(Internal style sheet),可以在head標籤內加上style標籤。如下:<head> <style> p{color:red;} </style> </head> <p>紅色字體</p>
紅色字體
不過這兩種方式難以將css的程式碼重複運用,且不好管理,因此我們使用第三種方法,便是將css寫成檔案(External style sheet)。 首先在head標籤內加上以下程式碼:
<head>
	<link type="text/css" rel="stylesheet" href = "stylesheet.css">
</head>
stylesheet.css是css的檔案,延伸檔名為css,檔案名稱可自取,此處稱之為stylesheet。 接下來只要將css程式碼寫在檔案內即可。記得不需要再加上<style>了。一般來說,這三種的優先順序為行內>嵌入>檔案。若在同一個檔案內有針對同一個元件的定義,則後面的優先於前面的。
註解的寫法
註解就是程式不會執行的內容,可方便我們了解程式碼的意義。在css檔案中的註解寫法請使用:- /*區塊註解*/
而在html中,註解的寫法如下:
- <!--區塊註解-->
那麼使用Embeded方式的css,也就是寫在head內的css註解要怎麼寫?測試了一下,使用css的註解寫法可正常使用。
長度單位
在網頁設計中的單位同常使用px(pixels)或是em。em為字體預設大小,通常為16px, 不同的環境可能有所不同。也可以使用其他絕對單位例如cm, mm, in等。或是使用%來表示比例。
vw(view width)跟vh(view height)指的是視窗可視範圍,使用方式跟%類似,例如30vw指的是螢幕可視範圍的30%。例如建立一個div:
<div></div>
設定其為一個隨著視窗縮放而跟著縮放的正方形。
div{
  width: 20vw;
  height: 20vw;
  background-color: aquamarine;
  margin:auto;
}
將寬高的單位都設為20vw(或是20vh)即可。
div{
  width: 20vh;
  height: 20vh;
  background-color: aquamarine;
  margin: 40vh auto;
}
這個做法可以讓方形區塊保持在螢幕正中。
vmin跟vmax指的是可視螢幕較小與較大的的邊,例如寬度1200px,高度800px,那麼vmin=800/100=8,vmax=1200/100=12。可用在可以翻轉的螢幕,例如手機。
div{
  width: 40vmin;
  height: 40vmin;
  background-color: aquamarine;
  margin: 30vmin auto;
}
使用變數
變數(var)讓我們先定義常用的參數供使用。變數命名需要以雙橫線(--)開始。
:root{
	--bg-pink: pink;
	--bg-lightgreen: lightgreen;
	--color-blue: blue;
	--color-red: red;
	--mar10: 10px 0px;
}
.vardiv1{
	background: var(--bg-pink);
	color: var(--color-blue);
}
.vardiv2{
	background: var(--bg-lightgreen);
	color: var(--color-red);
	margin: var(--mar10);
}
.vardiv3{
	background: var(--bg-lightgreen);
	color: var(--color-blue);
}
2. 如何選擇物件?
我們要如何使用css的程式碼影響網頁中的物件,有以下幾個方式。 第一個語法是聲明tag的名稱,例如:p{
color:red;
}
用這個方式的意思就是網頁中所有的p之內的文字都變成紅色。又或者如下:
body{
	background:black;
}
這表示背景顏色為黑色。
使用class
我們可以定義某一個類型的格式,只要定義其class即可,網頁中可以有數個物件使用同一個class名稱。例如:<div class="red"> 在div內。 </div> <p class="red"> 在p內。 </p>
然後在css檔案內定義red類別,如下:
.red{
	color:red;
}
顯示如下:
在p內。
由上例可知只需要使用.classname{}語法即可。上面例子中一個是div一個是p,若是要強調是其中某一種物件,可以使用以下方式。 跟之前類似的先定義兩個物件如下:<div class="blue"> 在blue div內。 </div> <p class="blue"> 在blue p內。 </p>
接下來在css內加上代碼:
p.blue{
	color:blue;
}
div.blue{
	color:blue;
	background: yellow;
}
顯示如下:
在blue p內。
除此之外,兩個class可以加乘使用,例如我們有另一個css class如下:p.pinkback{
background:pink;
}
現在加入一個新的物件如下:
<p class="blue pinkback">
	在blue pink p內。
</p>
顯示如下:
在blue pink p內。
很明顯同一個物件可以受到兩個以上的class同時影響,只要將其同時寫入class名稱之內即可。
使用id
另一個方式是設定物件的id,一般來說,使用id選擇的優先權大於class。<p id="pWithid">有id的p</p>
接下來在css檔案內加上以下程式碼:
#pWithid{
	color: Chocolate;
}
顯示效果如下:
有id的p
可以看見p內的顏色改變了。注意在css內需要在id之前使用#字號,與class所使用的.有所區別。這樣看起來跟使用class好像沒有不同,事實上確實是可以達到一樣的效果,不同處是每個網頁的id是唯一的, 而class卻是可以有多個,相同的class分享相同的效果內容。那為何要使用id呢?在css中無所謂,不過在JavaScript中就有用了。
那可以同時使用id跟class嗎?答案是肯定的,例如建立以下物件:
<p id="pWithid2" class="red">有id的p</p>
此處的class借用之前所建立的red。在css中加上以下程式碼:
#pWithid2{
	background: Cornsilk;
}
結果顯示如下:可看見兩個效果加乘在一起了。
有id的p
使用>
在選擇元件時,若是使用>表示之後選擇的元件為前元件的直接下層,也就是其child。例如:<div class="adiv"> <h3>a div</h3> <p>p1</p> <p>p2</p> <span><p>p inside span</p></span> </div>
div.adiv{
	border: 1px solid blue;
}
.adiv p{
	border:1px solid red;
	color:green;
	margin:5px;
}
a div
p1
p2
p inside span
.adiv>p{
	background:lightgrey;
}
可以發現只有前兩個p有背景顏色,因為只有前兩個是div的直接下層。
使用+號或~符號
在選擇元件時,若是使用+號表示之後選擇的元件為前元件的下一個元件(或隔壁元件),也就是其sibling。例如:<p>p before div</p> <div class="bdiv"> <h3 style="text-align:center;">a div</h3> </div> <p>p after div</p> <h4>Whatever</h4> <p>p after p after div</p> <div>another div <p style="margin-left:2em;">one p inside another div</p> </div> <p>another p</p>
.bdiv{
	border: 1px solid blue;
}
div.bdiv+p{
	border:1px solid green;
	background:lightgrey;
}
p before div
a div
p after div
Whatever
p after p after div
one p inside another div
another p
此例中選擇的是div的後一個p。若是使用~符號表示選擇某元件的所有siblings,例如加上以下的CSS:
div.bdiv~p{
	color: red;
}
此處選擇緊鄰div之後的所有p。
Pseudo-class
Pseudo-class代表某一動作或狀態,使用:號緊接於所選擇的元件來定義,常見的動作例如hover。舉例如下:<div class="cdiv" style="border:1px solid blue;"> <h3 style="text-align:center;">a div</h3> </div>
div.cdiv:hover{
	background:lightgrey;
}
a div
當某元件在hover時,可以控制其內另一元件,例如:
<div class="ddiv" style="border:1px solid blue;">
	<h3 style="text-align:center;">a div</h3>
	<p>
		Here we go.
	</p>
</div>
.ddiv p{
	display:none;
	background:pink;
}
.ddiv:hover p{
	display:block;
}
a div
Here we go.
常見的Pseudo-class應是a,請參閱第6單元超連結。另一則為nth-child() selector,請參閱第8單元 List。
Pseudo-element
Pseudo-element可以用來修改某一元件的部分部位,語法是元件加上::pseudo-element,可用的pseudo-element有before、after、first-line、first-letter、selection。舉例如下:<p class="pep" style="border:1px solid blue;">
Superman was born on the planet Krypton and named Kal-El. As a baby, he was sent to Earth in a small
spaceship by his scientist father Jor-El moments before Krypton was destroyed in a natural cataclysm.
His ship landed in the American countryside; he was found and adopted by farmers Jonathan and Martha Kent,
who named him Clark Kent. Clark displayed various superhuman abilities, such as incredible strength and
impervious skin.</p>
.pep::first-line{
	color: olive;
}
.pep::first-letter{
	color: red;
	font-size: 120%;
	padding-left: 1em;
}
.pep::selection{
	color: gold;
	background: darkred;
}
Superman was born on the planet Krypton and named Kal-El. As a baby, he was sent to Earth in a small spaceship by his scientist father Jor-El moments before Krypton was destroyed in a natural cataclysm. His ship landed in the American countryside; he was found and adopted by farmers Jonathan and Martha Kent, who named him Clark Kent. Clark displayed various superhuman abilities, such as incredible strength and impervious skin.
可以看到第一行(first-line)的顏色改變,隨著視窗大小變化,無論第一行有多長,都只會改變第一行。first-letter改變的自然是第一個字母,而slection則是使用滑鼠選取文字時所出現的改變。
Another example:
p{
    width: 500px;
}
p::first-letter {
    color: red;
    font-size: 3rem;
    line-height: 0;
    display: block;
    float: left;
    margin-top: .125rem;
    margin-right: .5rem;
}
p::first-line {
    color: blue;
}
p::selection{
	color: gold;
	background: darkred;
}
before與after的用法是在某元件的前後插入內容。例如:
<p>
鹿 柴: <poem>空 山 不 見 人 , 但 聞 人 語 響 。返 景 入 深 林 , 復 照 青 苔 上 。</poem><br>
送 別: <poem>山 中 相 送 罷 , 日 暮 掩 柴 扉 。春 草 明 年 綠 , 王 孫 歸 不 歸 。</poem><br>
相 思: <poem>紅 豆 生 南 國 , 春 來 發 幾 枝 ?願 君 多 采 擷 , 此 物 最 相 思 。</poem>
</p>
poem::before{
	content: "『";
}
poem::after{
	content: "』";
}
鹿 柴:
送 別:
相 思:
要注意的一點是一定要有content這個值。content除了字串外,還可以是元件的屬性。例如:
<a href="http://www.nkust.edu.tw" target="_blank" class="nkusta">NKUST</a>
.nkusta::before{
	content: url(images/itemicon1.jpg);
}
.nkusta::after{
	content: '('attr(href)')';
	color: red;
}
NKUST
content內容可以是屬性或是圖片,還可以累加其他字串或內容,也可以使用css修飾。
Attribution-selector
Attribution-selector意思就是根據元件的屬性來選擇元件,例如有以下幾個元件,都包含一個屬性名為title:<p title="one">一個p</p> <p title="two">兩個p</p> <p title="one p">有一個p</p> <p title="two-pp">有一個兩p</p> <p title="onepp">一個一p</p>
p[title="one"]{
	background:lightgrey;
}
p[title~="one"]{
	color:blue;
}
p[title|="two"]{
	color:red;
}
p[title^="one"]{
	text-decoration:underline;
}
p[title$="pp"]{
	font-style:italic;
}
[title*="wo"]{
	text-align:center;
}
用法解釋如下:
- [title="one"]:title等於one
- [title~="one"]:title包含one這個字
- [title|="two"]:title以two這個字開頭,其後可以接-。
- [title^="one"]:title開頭為one這三個字母(不需是獨立的字)。
- [title$="pp"]:title結尾為pp這兩個字母。
- [title*="wo"]:title包含wo這兩個字母。
一個p
兩個p
有一個p
有一個兩p
一個一p
3. 顏色
在css中可以改變顏色,在之前的例子中可以看到,我們可以改變文字顏色,或是背景顏色。 還有其他許多地方例如邊框顏色等都會使用到顯示顏色的功能。那麼有哪些方式可以表示顏色呢? 通常可使用以下幾種。- 第一種為直接給顏色名字,在HTML中支援許多的顏色名稱,在之前的例子中已出現數個, 其他名稱可參考>>這裡。
- 第二種方式為使用16進位法的方式來表示,在顏色名稱的網站內有一欄為HEX,便是16進位的表示法。 當我們使用的時候,把之前使用顏色名稱改變為16進位法即可,記得之前有一個#字號。例如:#FF0000表示紅色, 每兩個數字為一組,分別表示紅綠藍三原色,每個部分數字大些,該種顏色的比例就多點。
-
第三種方式為RGB表示法,還是一樣紅藍綠,只是使用0-255的數字來表示,數字越大顏色比例越多。例如:
<p class="p3_1">雖然class名稱可以隨意取,不過最好還是有意義</p>
在css內加上程式碼如下:
p.p3_1{
	color: rgb(255,0,0);
	background: rgb(0,255,0);
}
顯示如下:
雖然class名稱可以隨意取,不過最好還是有意義
-
第四個方式為RGBA表示法,這跟第三種相同,多出一個為不透明度,數值介於0-1.0之間,數值越大表示透明度越差。例如:
<p class="p3_2">RGBA的A表示Opacity</p>
在css內加上程式碼如下:
p.p3_2{
	color: rgb(255,0,0);
	background: rgba(0,255,0, 0.2);
}
顯示如下:
RGBA的A表示Opacity
可以看出背景顏色變淡了。 -
一般來說,以上三種應已足敷使用,另外尚有HSL及HSLA表示法,其中H表示顏色,0-119為紅色,120-239為綠色,240-359為藍色。
S表示顏色的百分比,L表示光亮的百分比,A顯然還是不透明度。舉例如下:
<p class="p3_3">HSLA的用法</p>
在css內加上程式碼如下:
p.p3_3{
	color: hsl(0,100%,30%);
	background: hsla(300,75%, 60%, 0.2);
}
顯示如下:
HSLA的用法
請自行調整數值看顏色變化。
漸層色
漸層色是顏色的變化,可分為線性(Linear)及放射狀(Radial)兩種。其語法為:background: linear-gradient(direction, color-stop1, color-stop2, ...);
background: radial-gradient(shape size at position, start-color, ..., last-color);
先試線性的例子。
<div class="p3_4"></div>
css code:
div.p3_4{
	height: 200px;
	background: red; // for browers that don't support gradient
	background: linear-gradient(red, green);
}
顯示如下:
預設值是由上往下,若是要改變方向可使用指令to right, to left, to top等。例如使用:
background: linear-gradient(to right, blue, pink);
也可以把方向用角度表示,使用類似0deg, 90deg, 180deg等來替代to right, to left等。例如使用:
background: linear-gradient(45deg, black, white);表示往45度角方向。 方向的定義為往上0度,然後順時針方向增加。也就是說0deg指to top,90deg指to right。
若想使用多於兩種顏色,則將顏色都寫進去即可。例如使用:
background: linear-gradient(45deg, red, orange, yellow, green, blue, purple);
表示顏色若是使用例如rgba則可以再將opacity應用上去。
可以使用background: repeating-linear-gradient(red, green 25px ,blue 50px); 指令來重複漸層色,其中的止色長度也可以使用百分比來表示。
radial-gradient
放射狀漸層跟線性指令類似,例如使用background: radial-gradient(red, green ,blue);
同樣可以控制其大小,例如改為background: radial-gradient(red 10%, green 30%,blue 50%);
可在顏色之前加上circle使得放射狀為正圓。也可移動中心位置,使用at關鍵字。例如:
background: radial-gradient(at 10px 50px , red, green ,blue );
若是沒有使用at,則表示形狀的大小。若是圓形僅可使用一個數值,因為只需要半徑。
與線性漸層類似,可以使用repeating-radial-gradient指令來重複漸層。
4. Box Model
HTML中的物件可以視為一個盒子,稱之為盒子模型。其中的內容稱為Content,之外分為三層,由內往外分別為padding, border, 以及margin. 示意圖如下:(可於網頁按F12即可看見)
我們可以想像content是城堡中的房子,border是城牆,padding是房子到城牆的距離,而margin則是護城河。 接下來看如何對這些屬性作改變。
Border
Border就是邊界,可以有以下幾種形式:- dotted
- dashed
- solid
- double
- groove
- ridge
- inset
- outset
- none
- hidden
- mix
- border-style: 邊界形式
- border-width: 邊界寬度
- border-color: 邊界顏色
- border-top-(1,2,3), border-right-(1,2,3), border-bottom-(1,2,3), border-left-(1,2,3)
用來分開表示上右下左各邊的邊界屬性(1,2,3)表示前三種屬性亦即形式寬度或顏色。
<p class="css4_border1"> 邊界的練習 </p>
然後再在css檔案中加上:
p.css4_border1{
	border-style: solid;
	border-width: 3px;
	border-color: #ff00ff;
}
結果顯示如下:
邊界的練習
再練習一個控制個別方向邊界的例子,先設計一個p:<p class="css4_border2"> 各邊邊界的練習 -- 右邊沒指定所以沒邊界 </p>
加入css程式碼:
p.css4_border2{
	border-left-style: groove;
	border-left-width: 1em;
	border-left-color: #ff00ff;

	border-top-style: dashed;
	border-top-color: #0000ff;

	border-bottom-style: ridge;
	border-bottom-color: #00ff00;

	background-color: grey;
	color: yellow;
}
結果顯示如下:
各邊邊界的練習 -- 右邊沒指定所以沒邊界
Border的簡寫
如果已經確定各屬性,可以將其寫成一行,例如寫成:border: 5px solid red;
這樣直接便可指派寬度、型態、以及顏色三個屬性。
Border的弧狀邊角
邊界的邊角初始設定為直角,若是要將其換成有弧度的邊角,則使用border-radius屬性,只要給半徑數值即可。 例如設計一個div如下:<div class="css4_border3"> 可以擁有有弧度的邊角 </div>
加上css的程式碼:
div.css4_border3{
	border: 3px solid red;
	border-radius: 10px;
	background: #98fb98;
}
顯示如下:
也可以針對不同角製作不同的圓角,例如:
<div style="width:100px; height:100px; background: #abcdef; margin-right:20px;
padding:10px;border-radius: 10px 20px 30px 40px; display: inline-block;">
border-radius: 10px 20px 30px 40px;
</div>

<div style="width:100px; height:100px; background: #fabfcd;  margin-right:20px;
padding:10px;border-radius: 10px 40px 30px; display: inline-block;">
border-radius: 10px 40px 30px;
</div>

<div style="width:100px; height:100px; background: #9af2bf;
padding:10px;border-radius: 10px 20px 30px; display: inline-block;">
border-radius: 10px 30px;
</div>
若是給border-radius: 10px 20px 30px 40px; 表示自左上角開始順時針方向逐一應用到各角。若是只給三個數值,則第四個角的值等同第二個角的值。若是只給二個數值,表示1,3與2,4角。
也可以建立橢圓形的邊角:
<div style="width:100px; height:100px; background: #abcdef; margin-right:20px;line-height:100px;
padding:10px;text-align:center;border-radius: 50px/100px; display: inline-block;">
50px/100px
</div>

<div style="width:100px; height:100px; background: #fabfcd; margin-right:20px;line-height:100px;
padding:10px;text-align:center;border-radius: 50%/30%; display: inline-block;">
50%/30%
</div>

<div style="width:100px; height:100px; background: #9af2bf;line-height:100px;
padding:10px;text-align:center;border-radius: 50%; display: inline-block;">
50%
</div>
其中50px/100px、50%/30%、50%指其半徑。
Padding
接下來看Padding,其意義就是內容與邊界間的距離。先設計一個與前類似的物件:<div class="css4_padding1"> Padding是內容與邊界的距離 </div>
加入css程式碼:
div.css4_padding1{
	border: 3px solid red;
	border-radius: 10px;
	background: #98fb98;

	padding: 20px;
}
顯示結果如下:
padding跟border一樣也可以個別決定四面各邊的距離,一樣加上top, right, bottom, 跟left即可。例如以下例子:
<div class="css4_padding2"> 各邊的padding數值為top=10, right=0, bottom=20, left=30; </div>
div.css4_padding2{
	border: 3px solid red;
	border-radius: 10px;
	background: #98fb98;

	padding-top: 10px;
	padding-right: 0px;
	padding-bottom: 30px;
	padding-left: 30px;
}
結果如下:
Padding的簡寫
我們可以直接寫padding: 10px 0px 30px 30px;來表示上右下左四面的padding數值。 若是只給三個數值,則表示上右下三邊的數值。若是只給兩個數值,則第一個數值表示上下, 第二個數值表示左右。若是僅一個數值當然指四面都相同。Padding跟元件寬度的關係
若是又有padding屬性,又有寬度(width)屬性,那麼整個長度為兩者相加。例如:<div class="css4_padding3"> 一個div,寬度為25+250+25=150 </div>
css程式碼:
div.css4_padding3{

	background: #98fb98;
	padding: 25px;
	width: 300px;
}
顯示結果如下:
若是要保持寬度為300,則可以加上box-sizeing: border-box這行指令來保持寬度為300。
margin
margin就是城牆外面的護城河,也是在兩個物件之間的範圍。舉例說明如下,先設置兩個元件:<p class="css4_margin1"> 第一個p </p> <p class="css4_margin1"> 第二個p </p>
然後加上css程式碼:
p.css4_margin1{

	border: 1px solid black;
	background: #fffb98;
	padding: 10px;
	width: 300px;
	margin: 0px;
}
顯示如下:
第一個p
第二個p
可以看到兩個P緊緊的連在一起,那是因為我們設定了
<span class="stress">margin : 0px;</span>的關係,也就是沒有護城河。 若是沒有設定,則兩個元件之間會有間隔,那是因為有預設值的關係。跟之前的border與padding相似,margin也可以獨立處理, 只要加上top, right, bottom, left等關鍵字即可。
margin的簡寫
也是跟之前的border與padding相似,可以直接使用margin : 5px 10px 15px 20px;形式來表示上右下左四面的邊界。 若是只給三個數值,表示上右下,若是只給兩個數值,則表示上下及左右,當然一個數值則表示四面的margin相同。margin的值可以使用auto,這樣會出現甚麼情況呢?如下例:
<p class="css4_margin2"> 第一個p </p>
<p class="css4_margin2"> 第二個p </p>
跟前例類似的css程式碼:
p.css4_margin2{

	border: 1px solid black;
	background: #fffb98;
	padding: 10px;
	width: 300px;
	margin: auto;

}
第一個p
第二個p
可見他們直接置中了。
auto value
如果margin設定為auto,元件會置中(針對其container)。<div id="diva">寬度500px</div><br> <div id="divb">寬度500px</div>
#diva{
	width:500px;
	margin:auto;
	border:3px solid blue;
}
#divb{
	max-width:500px;
	margin:auto;
	border:3px solid red;
}
這裡設計兩個div,margin都是auto,所以會自動置中,一個使用width,一個使用max-width,差別是使用max-width可以視視窗大小而改變其寬度,使用width則不會,所以應盡量使用max-width。
inherit
如果margin設定為inherit,元件的margin會繼承其上層。<div id="inh1"> width=500px <div id="inh2">max-width=500px</div> </div>
#inh1{
	border:3px solid blue;
	max-width:500px;
	margin-left:50px;
}
#inh2{
	border:3px solid red;
	max-width:500px;
	margin:inherit;
}
這裡一樣設計兩個div,inh2的margin繼承自其上層(inh1)。兩者都使用max-width,會自動調整寬度且inh2的右邊不會超出inh1的範圍。
margin collapse
如果兩個元件上下相疊,有時候上下margin會合而為一(取其大者)。<div style="margin: 0px 0px 50px 0px; width:500px; border: 3px solid blue;">
width=500px
</div>
<div style="margin: 20px 0px 0px 0px; width:500px; border: 3px solid red;">
max-width=500px
</div>
此處上下兩個div的margin等於50,而不是50+10=60。請試著修改10px為20px、30px、40px、50px等,觀察margin是否有改變,若是大於50px又是否有改變?
outline
outline的定義是繪製在border外圍的線。可以使用outline-style屬性修改線的style,可選用的style有如下幾種:| dotted | dashed | solid | double | groove |
| ridge | inset | outset | none | hidden |
<div style="border:5px solid red;max-width:500px;margin:auto;outline-style:solid;outline-color:blue;outline-width:5px;">
一個div
</div>
這可以讓元件顯得更加突出。此外,還可以使用ontline-offset來設定border與outline間的空間。
<div style="border:5px solid red;max-width:500px;margin:auto;outline:thick ridge blue;outline-offset: 5px;">
Another div
</div>
outline-offset: 5px;表示border與outline間距離為5px。 outline:thick ridge blue;是快速簡寫,分別為width、style、color,其中style是必須的,其餘兩者可以省略不寫。寬度可使用thick、thin、medium等來描述,當然也可直接使用px。
box-shadow
box-shadow就是在box外加上陰影,原則上就是增加變化。主要的語法形式為box-shadow:h-offset(水平向位移)、v-offset(垂直向位移)、blur(模糊)、spread(延展)、color、inset(陰影往內)。其中h-offset與v-offset是必須要給的值,其餘可選擇性提供。
<div style="display: inline-block;border: 1px solid;background: lightgreen;width:100px;height:100px;
margin-right:10px;box-shadow:5px 10px;">box 1</div>
<div style="display: inline-block;border: 1px solid;background: lightgreen;width:100px;height:100px;
margin-right:10px;box-shadow:5px 10px pink;">box 2</div>
<div style="display: inline-block;border: 1px solid;background: lightgreen;width:100px;height:100px;
margin-right:10px;box-shadow:5px 10px 10px blue;">box 3</div>
<div style="display: inline-block;border: 1px solid;background: lightgreen;width:100px;height:100px;
margin-right:10px;box-shadow:5px 10px 10px 10px red;">box 4</div>
<div style="display: inline-block;border: 1px solid;background: lightgreen;width:100px;height:100px;
margin-right:10px;box-shadow:20px 20px 5px 20px white inset;">box 5</div>
</div>
box-sizing
在設定padding, border等屬性後,我們常發現盒子比我們原始設定來得大了, 因為要將所有林林總總的長度都加上去,為了避免還要計算,可以使用 box-sizing屬性,如此便可以容易設定我們想要的寬度。 可以使用的參數有content-box與border-box,前者指寬高便是內容的寬高(此為預設值), 後者指寬高為計算到border的寬高。 例如設計兩個div如下:<div class="css4_sizing1"></div> <div class="css4_sizing2"></div>加上css的程式碼:
div.css4_sizing1{
	box-sizing: content-box;
	background: blue;
	border: 20px solid green;
	width: 500px;
	height: 50px;
	margin-bottom: 10px;
}

div.css4_sizing2{
	box-sizing: border-box;
	background: blue;
	border: 20px solid green;
	width: 500px;
	height: 50px;
	margin-left: 20px;
}
顯示結果如下:
我們讓第二個div左邊的margin等於20px(剛好是第一個div的border寬度), 可見第二個box的寬度剛好等於第一個box的content寬度,也就是說第二個 box的寬度正好等於500px。
display
display控制元件在網頁中如何安排或配置空間位置,每個元素都有一個預設的display值,大多為block(e.g. div, nav, header, footer, section, p)或inline(e.g. span)。我們常需要修正元件的display值來使得其排列符合我們的需要。以下介紹數個常見之display。- block:區塊,也就是一行一個。第二個會從新的一行開始。例如圖片img的預設display為inline-block(也就是兩張圖片若沒超過寬度範圍會左右並排),若是想要讓圖片不會平行並排,可以設定其display為block。
<img src="images/img4.jpg" style="display:block;">
<img src="images/img4.jpg" style="display:block;">

- inline:單行平行排列,也就是排成一行。例如ul中的li預設為list-item,若要將其排成一行(see also: list)則:
<ul class="inlineul">
	<li>one</li>
	<li>two</li>
	<li>three</li>
</ul>
.inlineul>li{ display: inline; background: olive; color: cyan; }- one
- two
- three
- inline-block:區塊排列成一行。例如:
<div class="ibdiv">div1</div>
<div class="ibdiv" style="width:100px;">div2</div>
<div class="ibdiv" style="height:100px; padding-top:50px;">div3</div>
.ibdiv{ border:2px solid blue; display:inline-block; }div1div2div3在此勿使用display:inline;,因為光是inline無法設定寬高以及上下的margin、padding等屬性。 - grid: 網格狀布置請參考Grid。
- flex: 請參考Flexbox
- list-item: 變成列表形式(e.g. li),但可能會被之前內容影響編號。例如:
<todo class="errand">Buy eggs</todo>
<todo class="errand">Wash bike</todo>
<todo class="errand">Do the laundry</todo>
.errand{
	display: list-item;
	list-style-type: lower-roman;
}
Buy eggs Wash bike Do the laundry - none: 屬性為display:none;的物品不會顯示,且不佔據空間。(屬性為visibility:hidden;的物品也不會顯示,但是依然佔據著空間。)
overflow
overflow是控制當內容超過容器範圍時的反應,可能的值有:visible、hidden、scroll、auto。<div style="height:200px;width:400px;overflow:auto;background:grey;">
This paper studies the Feeder Vehicle Routing Problem (FVRP), a new variant of the vehicle routing problem
(VRP), in which each customer is served by either a large (truck) or a small vehicle (motorcycle). In this particular
type of delivery, the trucks and the motorcycles must depart from the depot, visit the customers, and
eventually return to the depot. During the delivery process, the motorcycles travel to the truck locations for
reloading. The ant colony optimization (ACO) algorithm is employed for solving the problem with the objective
of determining the number of dispatching sub-fleets and optimal routes to minimize the total cost (fixed route
and travel costs). Three benchmark datasets are generated to examine the performance of the FVPR. For comparison
purposes, all instances are executed by dispatching only trucks as in the traditional VRP and a four-stage
hierarchical heuristic. Additionally, ACO is compared to optimal solutions for small instances. The results indicate
that the proposed ACO algorithm yields promising solutions particularly for large instances within a
reasonable time frame in an efficient manner.
</div>
修改overflow的值可以看到不同的效果。此外若只想讓某一方向出現scroll,也可以使用overflow-x:scroll;或overflow-y:scroll;,可以同時定義這兩向的值且可以不相同,例如overflow-x:hidden;overflow-y:scroll;。
float
float可以控制元件往某方向漂移,產生文繞圖效果,可能的參數有left、right、none、inherit。在html中介紹過使用align來產生文繞圖效果,此處使用float實作。<img src="../html/superman.png" style="float:right;">
Superman was born on the planet Krypton and named Kal-El...
<img src="images/superman1.jpg" style="float:left;">
Superman is a cultural icon of the United States...
 Superman was born on the planet Krypton and named Kal-El. As a baby, he was sent to Earth in a small spaceship by his scientist father Jor-El moments before Krypton was destroyed in a natural cataclysm. His ship landed in the American countryside; he was found and adopted by farmers Jonathan and Martha Kent, who named him Clark Kent. Clark displayed various superhuman abilities, such as incredible strength and impervious skin. His foster parents advised him to use his gifts for the benefit of humanity, and he decided to use his powers to fight crime as a vigilante. To protect his privacy, he changes into a colorful costume and uses the alias "Superman" when fighting crime. Clark Kent resides in the fictional American city of Metropolis, where he works as a journalist for the Daily Planet. Superman's love interest is his fellow journalist Lois Lane, and his classic arch-enemy is the genius inventor Lex Luthor. He is a friend of many other superheroes in the DC Universe, such as Batman and Wonder Woman.Superman was born on the planet Krypton and named Kal-El. As a baby, he was sent to Earth in a small spaceship by his scientist father Jor-El moments before Krypton was destroyed in a natural cataclysm. His ship landed in the American countryside; he was found and adopted by farmers Jonathan and Martha Kent, who named him Clark Kent. Clark displayed various superhuman abilities, such as incredible strength and impervious skin. His foster parents advised him to use his gifts for the benefit of humanity, and he decided to use his powers to fight crime as a vigilante. To protect his privacy, he changes into a colorful costume and uses the alias "Superman" when fighting crime. Clark Kent resides in the fictional American city of Metropolis, where he works as a journalist for the Daily Planet. Superman's love interest is his fellow journalist Lois Lane, and his classic arch-enemy is the genius inventor Lex Luthor. He is a friend of many other superheroes in the DC Universe, such as Batman and Wonder Woman.
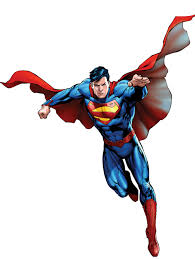 Superman is a cultural icon of the United States.Superman popularized the superhero genre and defined its conventions, and it remains one of the most lucrative superhero franchises.
Jerry Siegel and Joe Shuster met in 1932 while in high school in Cleveland, and they bonded over their mutual love of movies, pulp fiction magazines, comic strips, and science fiction. Siegel aspired to become a writer and Shuster aspired to become an illustrator. Siegel wrote science fiction stories which he self-published in a magazine called Science Fiction: The Advance Guard of Future Civilization. Shuster often provided illustrations for his work.
In January 1933, Siegel published a short story in his fanzine titled "The Reign of the Superman". The title character is a vagrant named Bill Dunn who is tricked by an evil scientist into consuming an experimental drug. The drug gives Dunn the powers of mind-reading, mind-control, and clairvoyance. He uses these powers maliciously for profit and amusement, but then the drug wears off, leaving him a powerless vagrant again. Shuster provided illustrations, depicting Dunn as a bald man.
Siegel and Shuster shifted to making comic strips, with a focus on adventure and comedy stories. They wanted to become syndicated newspaper strip authors, so they showed their ideas to various newspaper editors. However, the editors told them that their ideas weren't sensational enough; if they wanted to make a successful comic strip, it had to be something more sensational than anything else on the market. This prompted Siegel to revisit Superman as a comic strip character. He modified Superman's powers to make him even more sensational. The second prototype of Superman is also given powers against his will by an unscrupulous scientist, but instead of psychic abilities, he acquires superhuman strength and bullet-proof skin. Additionally, this new Superman was a crime-fighting hero instead of a selfish villain, because Siegel noted that comic strips with heroic protagonists tended to be more successful. In later years, Siegel recalled that this Superman wore a "bat-like" cape in some panels, but typically he and Shuster agreed that there was no costume yet, and there is none apparent in the surviving artwork.
Superman is a cultural icon of the United States.Superman popularized the superhero genre and defined its conventions, and it remains one of the most lucrative superhero franchises.
Jerry Siegel and Joe Shuster met in 1932 while in high school in Cleveland, and they bonded over their mutual love of movies, pulp fiction magazines, comic strips, and science fiction. Siegel aspired to become a writer and Shuster aspired to become an illustrator. Siegel wrote science fiction stories which he self-published in a magazine called Science Fiction: The Advance Guard of Future Civilization. Shuster often provided illustrations for his work.
In January 1933, Siegel published a short story in his fanzine titled "The Reign of the Superman". The title character is a vagrant named Bill Dunn who is tricked by an evil scientist into consuming an experimental drug. The drug gives Dunn the powers of mind-reading, mind-control, and clairvoyance. He uses these powers maliciously for profit and amusement, but then the drug wears off, leaving him a powerless vagrant again. Shuster provided illustrations, depicting Dunn as a bald man.
Siegel and Shuster shifted to making comic strips, with a focus on adventure and comedy stories. They wanted to become syndicated newspaper strip authors, so they showed their ideas to various newspaper editors. However, the editors told them that their ideas weren't sensational enough; if they wanted to make a successful comic strip, it had to be something more sensational than anything else on the market. This prompted Siegel to revisit Superman as a comic strip character. He modified Superman's powers to make him even more sensational. The second prototype of Superman is also given powers against his will by an unscrupulous scientist, but instead of psychic abilities, he acquires superhuman strength and bullet-proof skin. Additionally, this new Superman was a crime-fighting hero instead of a selfish villain, because Siegel noted that comic strips with heroic protagonists tended to be more successful. In later years, Siegel recalled that this Superman wore a "bat-like" cape in some panels, but typically he and Shuster agreed that there was no costume yet, and there is none apparent in the surviving artwork.
當我們同時使用兩個元件(常是兩容器)接鄰,如果第一個使用float,第二個沒有使用,則可能出現以下情況:
<div style="float:left;width:100px;height:100px;border:2px solid red;"></div>
<div style="border:2px solid blue;margin:10px;">Superman was born on the planet Krypton and named Kal-El.</div>
在這個情況下,我們需要設定第二個為清除來讓其不跟float元素重疊,例如:
<div style="float:left;width:100px;height:100px;border:2px solid red;margin-bottom:10px;"></div>
<div style="border:2px solid blue;margin:20px;clear:left;">Superman was born on the planet Krypton and named Kal-El.</div>
如果上面的紅色框要放到藍色框內,且float:right;,當藍色框的長度小於紅色框時,又會出現重疊現象,此時可以在外框加上overflow:auto;,讓其隨著內框長度應變即可。
<div style="border:2px solid blue;margin:10px;clear:left;overflow:auto;">
	<div style="float:right;width:100px;height:100px;border:2px solid red;"></div>
	Superman was born on the planet Krypton and named Kal-El. As a baby,
        He was sent to Earth in a small spaceship by his scientist father Jor-El moments
        before Krypton was destroyed in a natural cataclysm.
</div>
5. 文字
可以使用css語法來修飾文字,例如改變顏色,這個之前提過了,再來看看有哪些可以變化。字體
可以使用font相關屬性來改變文字,計有:- font-family
- font-style
- font-size
- font-weight
- font-variant
- line-height
舉例說明。
<p class="css5_1">加入一堆�-如下,此處不�-出</p>
css code:
p.css5_1{

	border: 1px solid blue;
	padding: 5px;
	font-family: Times New Roman, Palatino Linotype, Arial, Helvetica;
	font-style: oblique; /* normal, italic, oblique*/
	font-size: 20px; /* 120% */
	font-weight: 100; /* normal, bold, bolder,  lighter, 100~900 */
	font-variant: small-caps; /*normal, small-caps*/

}
其中family列好幾個是以防前面的不支援,則使用後續的替補。style可決定是否為斜體,
size是字體大小,weight是粗細,variant的small-caps是小型大寫字。結果顯示如下:
This paper presents a study on routing problems associated with bridge inspection tasks. In the evaluatedproblems, a bridge inspection team must depart from the depot, visit bridges, and eventually return tothe depot. Since a single inspection team may require several days to perform this task, the inspectorsmust find lodging accommodations during the inspection period. This problem becomes a special type ofvehicle routing problem (VRP). Two types of scenarios are established for the bridge inspection problem. In the first scenario, only one inspection team is evaluated, and in the second scenario, more than oneinspection team and a specific inspection duration are assessed. The goal of this study is to determineoptimal routes and to find accommodations that minimize the total inspection cost, including the traveland lodging costs. The problem is solved using an ant colony optimization (ACO) algorithm. In addition, alocal search method is proposed for improving the quality of the solutions. Three benchmark datasets aregenerated to estimate the performance of the proposed method. First, a combination of the ACO parametervalues that yielded overall good results is determined, and subsequently the proposed method is appliedto the benchmarks. The results indicate that the proposed process yield promising solutions within areasonable time frame.
text
text的屬性如下:- align: center, left, right, justify
- decoration: none(e.g. remove underlines from links), overline, line-through, underline
- transform: uppercase, lowercase, capitalize
- indent: 10px(indentation of the first line of a text)
- letter-spacing: 3px, -3px
- line-height: 0.8, 1.8
- word-spacing: 10px, -5px
- text-shadow: 3px 2px blue(若是給三個數字則第三個為blur值,例如3px 2px 3px blue)
- direction: rtl(see also: bdo dir="rtl。bdo是相反文字方向,direction是在區塊(例如p)中自右往左編排,含意與效果並不相同。)
css code如下:
p.css5_2{

	border: 1px solid blue;
	padding: 5px;
	font-family: Times New Roman, Palatino Linotype, Arial, Helvetica;
	font-style: oblique; /* normal, italic, oblique*/
	font-size: 20px; /* 120% */
	font-weight: 100; /* normal, bold, bolder,  lighter, 100~900 */
	/*font-variant: small-caps; normal, small-caps*/

	text-align: justify;
	text-decoration: blink;
	text-transform: capitalize;
	text-indent: 10px;
	letter-spacing: 3px;
	line-height: 1.2;
	word-spacing: 5px;
	text-shadow: 3px 2px pink;

}
顯示結果:
This paper presents a study on routing problems associated with bridge inspection tasks. In the evaluatedproblems, a bridge inspection team must depart from the depot, visit bridges, and eventually return tothe depot. Since a single inspection team may require several days to perform this task, the inspectorsmust find lodging accommodations during the inspection period. This problem becomes a special type ofvehicle routing problem (VRP). Two types of scenarios are established for the bridge inspection problem. In the first scenario, only one inspection team is evaluated, and in the second scenario, more than oneinspection team and a specific inspection duration are assessed. The goal of this study is to determineoptimal routes and to find accommodations that minimize the total inspection cost, including the traveland lodging costs. The problem is solved using an ant colony optimization (ACO) algorithm. In addition, alocal search method is proposed for improving the quality of the solutions. Three benchmark datasets aregenerated to estimate the performance of the proposed method. First, a combination of the ACO parametervalues that yielded overall good results is determined, and subsequently the proposed method is appliedto the benchmarks. The results indicate that the proposed process yield promising solutions within areasonable time frame.
多行文字
我們可以將文字排列成多個區塊,類似報紙的效果,需使用column關鍵字。其包含以下屬性:- column-count: 欄數
- column-gap: 欄間隙寬度
- column-rule-style: 分隔線(solid, dashed, dotted, hidden, double, none, groove, ridge, inset, outset, initial, inherit)
- column-rule-width: 分隔線寬度
- column-rule-color: 分隔線顏色
- column-rule: 分隔線簡寫(width, style, color)
- column-span: 跨欄
- column-width: 欄寬(與column-count合用會互相干擾)
以下例說明:
<div class="css5_3">
	<h3>Application of the ...</h3>
	文字如下顯示,此處省略。
</div>
div.css5_3{
	column-count: 3;
	column-gap: 100px;
	column-rule-style: double;
	/*solid, dashed, dotted, hidden, double, none, groove, ridge, inset, outset, initial, inherit*/
	column-rule-width: 5px;
	column-rule-color: green;
	column-width: 200px;/*與column-count合用會互相干擾*/
	text-align: justify;

}


div.css5_3 h3{
	column-span: all;
	color: blue;
	font-size: 150%;
	text-align: center;
	font-variant: small-caps;
}
顯示結果如下:
Application of the ant colony optimization in the resolution of the bridge inspection routing problem
This paper presents a study on routing problems associated with bridge inspection tasks. In the evaluatedproblems, a bridge inspection team must depart from the depot, visit bridges, and eventually return tothe depot. Since a single inspection team may require several days to perform this task, the inspectorsmust find lodging accommodations during the inspection period. This problem becomes a special type ofvehicle routing problem (VRP). Two types of scenarios are established for the bridge inspection problem. In the first scenario, only one inspection team is evaluated, and in the second scenario, more than oneinspection team and a specific inspection duration are assessed. The goal of this study is to determineoptimal routes and to find accommodations that minimize the total inspection cost, including the traveland lodging costs. The problem is solved using an ant colony optimization (ACO) algorithm. In addition, alocal search method is proposed for improving the quality of the solutions. Three benchmark datasets aregenerated to estimate the performance of the proposed method. First, a combination of the ACO parametervalues that yielded overall good results is determined, and subsequently the proposed method is appliedto the benchmarks. The results indicate that the proposed process yield promising solutions within areasonable time frame.text align vertically
我們已經知道在某容器內的文字若要水平置中,可以使用text-align:center;(置中容器可使用margin:auto;),不過若是要垂直置中文字的話要如何辦到?以下有幾個方式:- 設定line-height(行高)與容器height等高(或是不設定height)
<section style="width:500px;height:150px;border:3px solid red;margin:auto;text-align:center;line-height:150px;">
This is the content.
</section>
This is the content.
這個方式僅能用於單行文字,若是超過一行文字的話則將文字放入另一個容器內(文字置於容器內自然可適用於多行,此後不再解釋),如下:<section style="width:500px;height:150px;border:3px solid red; margin:auto;text-align:center;line-height:150px;"> <article style="line-height:1.5;border:1px solid blue; display:inline-block;vertical-align:middle;width:400px;"> This is the content.This is the content.This is the content. </article> </section>This is the content.This is the content.This is the content.
中間容器內文字的line-height需重新設定,且讓其使用inline-block顯示。border可以不用,這裡僅是顯示作用。
width:400px;省略的話寬度與div同。 - 設定上下的padding,此時不要設定容器高度。此方法可以同時用於多行。
<section style="width:500px;border:3px solid red;margin:auto;text-align:center;padding:40px 0px;">
This is the content.This is the content.This is the content.
</section>
This is the content.This is the content.This is the content. - 設置一文字容器,再將此容器放置於div內,並分別設定position,讓容器置中。
<div style="width:500px;height:150px;border:3px solid red;position:relative;margin:auto;">
	<p style="border:1px solid blue;margin:0;text-align:center;width:400px;
	position:absolute;top:50%;left:50%;transform: translate(-50%,-50%);">
	This is the content.This is the content.This is the content.
	</p>
</div>
This is the content.This is the content.This is the content.
先設定div之position:relative;再設定文字容器postion:absolute;top:50%;left:50%;,此時文字容器之左上角位於div之正中,使用transform: translate(-50%,-50%);將文字容器之正中移至div之正中即可。此部分可參考第七單元圖片。
若要使文字容器與div等寬,可以設定width:inherit;(or width:500px;)。 - 使用display:flex;然後讓justify-content:center;align-items:center;水平垂直方向都置中即可。flex內容請詳閱第12單元flexbox。
<div style="width:500px;height:150px;border:3px solid red;margin:auto;
display:flex; justify-content:center;align-items:center;">
	<p style="border:1px solid blue;text-align:center;width:400px;">
	This is the content.This is the content.This is the content.
	</p>
</div>
This is the content.This is the content.This is the content.
若不使用垂直向置中align-items:center;,可以在p中使用align-self:center;代替。
也可以這樣做,一樣設定容器display:flex;,然後讓內層margin:auto;即可。<div style="width:500px;height:150px;border:3px solid red;margin:auto; display:flex;"> <p style="border:1px solid blue;text-align:center;width:400px;margin:auto;"> This is the content.This is the content.This is the content. </p> </div>This is the content.This is the content.This is the content.
- 設定div為display:grid;然後設定9格grid-template-rows:1fr auto 1fr; grid-template-columns:1fr auto 1fr;。接著將p命名為con,然後使用grid-template-areas將con定義為正中間位置。grid請詳閱第11單元Grid
<div style="width:500px;height:150px;border:3px solid red;margin:auto;
display:grid;grid-template-rows:1fr auto 1fr; grid-template-columns:1fr auto 1fr;
grid-template-areas:'. . .''. con .''. . .';">
	<p style="border:1px solid blue;text-align:center;width:400px;grid-area:con;">
	This is the content.This is the content.This is the content.
	</p>
</div>
This is the content.This is the content.This is the content.
CSS最好寫到檔案或head內,此處
grid-template-areas:
'. . .'
'. con .'
'. . .'";
使用多行描述比較好理解。
也可以使用justify-content:center;(或justify-items:center;)align-content:center;(或align-items:center;)來達到相同效果。
抑或者跟flex一樣在p中使用align-self:center;來替換div中的align-items:center;。<div style="width:500px;height:150px;border:3px solid red;margin:auto; display:grid;justify-content:center;align-items:center;"> <p style="border:1px solid blue;text-align:center;width:400px;"> This is the content.This is the content.This is the content. </p> </div>This is the content.This is the content.This is the content.
justify-items:center;align-items:center;可以縮寫為place-items:center;,所以可以使用place-items:center;來替換。
justify-content:center;align-content:center;可以縮寫為place-content:center;,所以可以使用place-content:center;來替換。
跟flex類似,設定div為display:grid;然後設定p為margin:auto;即可。 - 將div設為display:table-cell;(此時div視為一個table cell),然後使其vertical-align:middle;,如此可在垂直向置中。
<div style="width:500px;height:150px;border:3px solid red;display:table-cell;vertical-align:middle;">
	<p style="border:1px solid blue;text-align:center;width:400px;">
	This is the content.This is the content.This is the content.
	</p>
</div>
This is the content.This is the content.This is the content.
Writing mode
writing-mode可用來控制文字方向:<p style="writing-mode: horizontal-tb;">This is the first P</p>
This is<span style="writing-mode: vertical-rl;">一個</span>p
<p style="writing-mode: vertical-rl;height:200px;">
超人(英語:Superman) 是出現於DC漫畫的虛構超級英雄角色,
同時普遍也被認為是美國的文化符像(cultural icon)。</p>
This is the first P
This is一個p超人(英語:Superman) 是出現於DC漫畫的虛構超級英雄角色,同時普遍也被認為是美國的文化符像(cultural icon)。
這可以讓我們編輯中文。tooltip
tooltip就是當滑鼠移至某元件上時出現的提示,在html中我們可以使用attr屬性來達到此目的。此處使用CSS的方式:<p class="tooltip_p">NKUST <span class="tooltip_text">National Kaohsiung University of Science and Technology</span> </p>
.tooltip_p {
  position: relative;
  display: inline-block;
  border-bottom: 1px dotted black;
  font-weight: bold;
}

.tooltip_p .tooltip_text {
  visibility: hidden;
  width: 550px;
  background-color: lightgreen;
  color: blue;
  text-align: center;
  border-radius: 6px;
  padding: 5px 0;

  /* Position the tooltip */
  position: absolute;
  z-index: 1;
}

.tooltip_p:hover .tooltip_text {
  visibility: visible;
}
NKUST National Kaohsiung University of Science and Technology
6. 超連結
超連結使用a href="位址"來建立,有以下幾種屬性:- a:link{尚未連結}
- a:hover{滑鼠移到其上}
- a:visited{連結過的}
- a:active{滑鼠點下去時}
<a href="http://www.nkust.edu.tw" class="css6_1_nkust">NKUST</a>
css code: 請注意在:號與後面的文字間不要有空白。
a.css6_1:link{
	text-decoration: none;
	color: blue;
}

a.css6_1:hover{
	text-decoration: underline;
	color: #ff0000;
	background: orange;
}

a.css6_1:visited{
	text-decoration: none;
	color: green;
}

a.css6_1:active{
	text-decoration: none;
	color: gold;
}
顯示如下:
NKUST
button link
介紹兩種做法,第一種做法並不是拿button來做link,而是讓link看起來像button。<nav style="text-align:center; background:pink;padding:2px;"> <a href="#" target="_blank" class="buttonlike">連結一</a> <a href="#" target="_blank" class="buttonlike">連結二</a> <a href="#" target="_blank" class="buttonlike">連結三</a> <a href="#" target="_blank" class="buttonlike">連結四</a> <a href="#" target="_blank" class="buttonlike">連結�"</a> </nav>
.buttonlike:link, .buttonlike:visited{
	background: lightgreen;
	color: blue;
	padding: 5px;
	text-align: center;
	text-decoration: none;
	display: inline-block;<!--在同一line裡面的block-->
}
.buttonlike:hover, .buttonlike:active{
	background:#fa9c7f;
	color:red;
}
第二種做法當然就是直接使用button,這在html的button處介紹過,此處利用CSS來變化外觀。
<nav style="text-align:center; background:pink;padding:2px;">
	<a href="#" target="_blank" class="buttonlink"><button type="button">連結一</button></a>
	<a href="#" target="_blank" class="buttonlink"><button type="button">連結二</button></a>
	<a href="#" target="_blank" class="buttonlink"><button type="button">連結三</button></a>
	<a href="#" target="_blank" class="buttonlink"><button type="button">連結四</button></a>
	<a href="#" target="_blank" class="buttonlink"><button type="button">連結�"</button></a>
</nav>
.buttonlink>button{
	background: purple;
	color: white;
	border: none;
	padding: 5px;
	text-align: center;
	font-size:1em;
	font-family:標楷體;
	text-decoration: none;
	display: inline-block;
	transition-duration: 0.5s;
	cursor: pointer;
}
.buttonlink>button:hover{
	background: #fa9c7f;
	border-radius: 10px;
	color:red;
	box-shadow: 0 8px 16px blue;
}
這裡使用多個button屬性來讓其外觀與前例相同,而且在hover時額外增加了圓角(border-radius)、陰影(box-shadow)等屬性並讓其持續0.5秒(transition-duration: 0.5s;)。若想讓button都靠在一起,可以使用float:left;(此時可以將nav的background去除),要記得下一個元件需要使用clear:left;。
cursor有如下的選項:
auto、crosshair、default、e-resize、help、move、n-resize、ne-resize、nw-resize、pointer、progress、s-resize、text、w-resize、wait、inherit等。
Pagination
當網頁有多頁連續內容(e.g. 小說、論壇等),常需要顯示多頁選擇,稱為pagination。
<div style="text-align:center;"> <div class="pagi"> <a href="#">«</a> <a href="#">1</a> <a href="#">2</a> <a href="#" class="active">3</a> <a href="#">4</a> <a href="#">5</a> <a href="#">6</a> <a href="#">»</a> </div> </div>
.pagi{
	display: inline-block;
}
.pagi a{
	border: 1px solid olive;
	padding: 8px 16px;
	margin: 0 2px;
}
.pagi .active{
	background: lightgreen;
	color: red;
	border: 1px solid blue;
}
.pagi a:hover:not(.active){
	background: #ddd;
}
需要display: inline-block;這個屬性讓a可以設定padding、margin等。可以自己進行變化,例如沒有border、增加box的圓角、陰影、沒有間隙等。至於其功能則需要使用JS或是JQuery來達成。
target屬性
在使用<a href="#SomePartInThePage">時使用target屬性(:target)選擇目標(id="SomePartInThePage")。請看此範例。
加入的CSS如下:
:target{
	background: silver;
	color: blue;
}
也可用於建立tab menu(多頁選單模式)。例如設計如下的元件:
<div class="tabs">
	<a href="#tab1">Welcome</a>
	<a href="#tab2">Introduction</a>
	<a href="#tab3">About</a>

	<div id="tab1">
		<h3>Welcome to OOXX...</h3>
	</div>
	<div id="tab2">
		<h3>The introduction of OOXX...</h3>
	</div>
	<div id="tab3">
		<h3>About OOXX...</h3>
	</div>
</div>
.tabs div{
	display: none;
	background: cornsilk;
}
.tabs a{
	text-decoration:none;
}
.tabs div:target{
	display:block;
	color:black;
}
7. 圖片
舉例說明,加入一張圖片:<img class="css7_1" src="./images/img1.jpg" alt="Picture">css code:
.css7_1{
	border-radius: 50%;
	/*width: 50%;*/
	max-width: 50%;
	/*將圖片置中*/
	display: block;
	margin-left:auto;
	margin-right: auto;
}

.css7_1:hover{
	border: 2px solid red;
	box-shadow: 0 0 3px 2px green;
	opacity: 0.5;
	filter: grayscale(10%);
	transform: scaleX(-1);
}

- border-radius: 50%;是將邊角變成有弧度,也可以給數值例如100px。
- width: 50%;寬度為原圖片寬度的50%,也可以直接給數值例如500px。可以先使用軟體修改圖形大小以減少網頁的工作。 可直接使用max-width: 50%;最大為50%,但是會隨著視窗縮放而改變大小。
- display: block;margin-left:auto;margin-right: auto;這三行可將圖片置中。display: block;的意思是將圖片視為一個區塊。
- 圖片也可以有hover的屬性。並且可以加上border,shadow,及改變opacity
- filter可增加圖片的效果,有以下選擇:
- filter: grayscale(10%); 顯示黑白照片
- filter: blur(2px); 使照片模糊
- filter: brightness(250%);改變亮度
- filter: contrast(180%);改變對比反差
- filter: hue-rotate(180deg);色調旋轉
- filter: invert(100%);
- filter: opacity(50%);同opacity
- filter: saturate(7);色彩滲透
- filter: sepia(100%);深褐色
- filter: drop-shadow(8px 8px 10px green);同shadow
- transform: see next section。
transform
transform可以讓我們改變圖形型態,有以下選項:- transform: translate(50px, 100px);移動位置
- transform: rotate(45deg);旋轉
- transform: scale(2,3);縮放
- transform: scaleX(-1);X軸縮放,負號表示方向相反,數字表示比例
- transform: scaleY(-1);Y軸縮放,負號表示方向相反,數字表示比例
- transform: skewX(30deg);X軸扭曲
- transform: skewY(30deg);Y軸扭曲
- transform: skew(20deg, 30deg);雙軸扭曲
- transform: rotateX(150deg);X軸旋轉
- transform: rotateY(150deg);Y軸旋轉
- transform: rotateZ(150deg);Z軸旋轉
<div id="rotate1">r1</div>
<div id="rotate2">r2</div>
div#rotate1{
	width:100px;
	height:100px;
	background:lime;
	border:2px solid blue;
}
div#rotate2{
	width:100px;
	height:100px;
	background:pink;
	border:2px solid blue;
	transform: rotate(20deg);
}
<div id="translate1">t1</div>
<div id="scale1">s1</div>
<div id="skew1">s2</div>
div#translate1{
	width:100px;
	height:100px;
	background:red;
	border:2px solid blue;
	-ms-transform: translate(250px,50px); /* IE 9 */
	-webkit-transform: translate(250px,50px); /* Safari */
	transform: translate(250px, 50px;);
}
div#scale1{
	width:100px;
	height:100px;
	background:green;
	border:2px solid blue;
	transform: scale(2,3);
}
div#skew1{
	width:100px;
	height:100px;
	background:olive;
	border:2px solid blue;
	transform:skew(20deg,30deg);
}
對於一個物品一次僅能使用一個transform,若是使用兩個則後面一個生效(需使用matrix來達到多個效果,請見下一段)。針對不同的網路瀏覽器需要不同的語法,測試發現translate需使用-webkit-transform才能生效(在chrome),需針對不同瀏覽器再做測試。
若是要針對某一物品使用多個transform效果,可使用matrix(scaleX(),skewY(),skewX(),scaleY(),translateX(),translateY()),例如:
<div id="matrix1">m1</div>
div#matrix1{
	width:100px;
	height:100px;
	background:tomato;
	border:2px solid blue;
	transform:matrix(1,-0.3,0,1.5,150,50);
}
做個translate的應用
<button class="animatebutton">Button</button>
.animatebutton{
	padding: 15px 25px;
	font-size: 1em;
	cursor: pointer;
	text-align: center;
	text-decoration: none;
	outline: none;
	color: blue;
	background-color: lime;
	border: none;
	border-radius: 15px;
	box-shadow: 0 9px #999;
}

.animatebutton:hover{
	background: pink;
}

.animatebutton:active{
	background: green;
	color:silver;
	box-shadow: 0 5px #666;
	transform: translateY(4px);
}
在按下按鈕時,讓其往Y方向移動(translateY(4px)),如此可看起來像是真的按下按鈕一般。需要outline: none;,否則按下去會出現邊框。如果是多個button排成一列(e.g. in nav),可讓button的屬性(display:inline-block;)。
雙圖互調
簡單的方式讓滑鼠移過去之後顯示另一張圖。首先加入元件如下:<div class="css7_2"> <img class="i1" src="./images/img3.jpg" /> <img class="i2" src="./images/img4.jpg" /> </div>
在同一個div內放置兩個圖(利用圖形處理軟體讓其大小相同),然後加入css code如下:
.css7_2{
	width:300px;
	height: 168px;
}

.i1{
	max-width: 100%;
	max-height: 100%;
	position:absolute;
	opacity:1;
	transition: opacity 1s ease-in-out;
}

.i2{
	max-width: 100%;
	max-height: 100%;
}

.i1:hover{
	opacity:0;
}
顯示如下:

做法是先讓div的長寬固定。兩圖最大長寬皆設為100%,符合div的大小。 讓i1的position: absolute;並將i1的opacity設為1,hover時設為0,就會看到其下的i2。 以下解釋postion及transition。
position
position參數是定義位置,有以下幾種:- position:static; 這是預設值,照著瀏覽器預設的配置。
- position:relative; 相對應原來位置,需設定top、bottom、left、right。
例如以下元件及css code:
<div class="css7_3"></div>
.css7_3{
	position: relative;
	left:100px;
	width:100px;
	height:100px;
	background:white;
	border:1px solid red;
}
- position:fixed; 表示位置固定不變一樣需設定top、bottom、left、right。例如加上以下元件及css code。
<div class="css7_4">Fixed</div>
.css7_4{
	position: fixed;
	top: 300px;
	left:5em;
	color: gold;
	text-align:center;
	width:100px;
	height:100px;
	background: #0000ff;
	border: 1px solid #f00;
}
- position:absolute;這是表示其位置相對應其父元件,有點像是fixed,只是對應的是父元件。例如以下之元件及css code。
<div class="css7_5">
	<div class="css7_6">absolute</div>
</div>
.css7_5{
	position: relative;
	width:300px;
	height:300px;
	background: #0000ff;
	border: 1px solid #f00;
}

.css7_6{
	position: absolute;
	top: 100px;
	right:0px;
	text-align:center;
	width:100px;
	height:100px;
	background: #00ff00;
	border: 1px solid #f00;
}
absolute - position: sticky;是相對於滑動軸位置。如下例;
<div class="css7_7">
	太多字不列出
	<p class="css7_8">Bridge Inspection Routing Problem</p>
</div>
.css7_7{
	position: relative;
	text-align:center;
	background: #00ff00;
	border: 1px solid #f00;
	height:200px;
	overflow: auto;
}

.css7_8{
	position: sticky;
	top: 10px;
	left: 50px;
	text-align:center;
	height:auto;
	background: pink;
	border: 1px solid #f00;
}
Abstract:
Bridge Inspection Routing Problem
This paper presents a study on routing problems associated with bridge inspection tasks. In the evaluatedproblems, a bridge inspection team must depart from the depot, visit bridges, and eventually return tothe depot. Since a single inspection team may require several days to perform this task, the inspectorsmust find lodging accommodations during the inspection period. This problem becomes a special type ofvehicle routing problem (VRP). Two types of scenarios are established for the bridge inspection problem. In the first scenario, only one inspection team is evaluated, and in the second scenario, more than oneinspection team and a specific inspection duration are assessed. The goal of this study is to determineoptimal routes and to find accommodations that minimize the total inspection cost, including the traveland lodging costs. The problem is solved using an ant colony optimization (ACO) algorithm. In addition, alocal search method is proposed for improving the quality of the solutions. Three benchmark datasets aregenerated to estimate the performance of the proposed method. First, a combination of the ACO parametervalues that yielded overall good results is determined, and subsequently the proposed method is appliedto the benchmarks. The results indicate that the proposed process yield promising solutions within areasonable time frame. IntroductionThe collapse of the Silver Bridge over Ohio River in the UnitedSates in 1967 caused serious injuries and deaths, and induced theattention to the safety concerns of old bridges. In recent years,developed countries have reached the stage of aging bridges andhave begun allocating considerable amounts of funds to worksrelated to bridge inspection and maintenance. For example, theUnited States has spent nearly 78 million dollars of maintenancefunds and 131 million dollars of reserve funds for inspecting andreinforcing the nation’s 570,000 bridges during 1992–2011. Thismeans an average of 5.2 million dollars per year of maintenanceexpenses and 8.2 million dollars per year of reserve funds are spenton bridge inspection and rehabilitation [1]. In the Netherlands, an average annual maintenance cost is 37 million euros for concretebridges, 7 million euros for steel bridges, and 10 million eurosfor movable bridges [2]. The Australian Government reserved over$200 million Australian dollars from the 2015–2016 budget forupgrading or replacing aged bridges throughout New South Wales[3]. In Scotland, 350,000 pounds were allocated from the 2014 bud-get for undertaking annual bridge maintenance condition surveys[4], and more than 700,000 pounds were assigned for bridge struc-tural maintenance during 2015 [5].
可見無論怎麼移動捲動軸都會在固定位置。
Example: dodge.html
transition
transition是讓網頁在固定時間長度平緩的進行改變,語法是transition: 性質 時間 速度 delay
可以只給性質時間或性質時間速度。之前的範例是改變opacity性質,在1s時間內,速度特性是ease-in-out。 再看以下例子:
<div class="css7_9"></div>
.css7_9{
	width:100px;
	height:100px;
	background: #a9bcff;
	border: 1px solid #f00;
	transition: width 2s;
	transition-delay: 1s;
}

.css7_9:hover{
	width: 500px;
}
速度特性有以下選擇:
- ease: 預設值,開始與結束慢,中間快。
- linear: 從頭到尾速度相同。
- ease-in: 開始慢。
- ease-out: 結束慢。
- ease-in-out: 開始與結束慢
- cubic-bezier(n,n,n,n): 自訂速度曲線函數。
One more example
HTML:<a href="#">Transitions</a>
CSS:
body{
  margin: auto;
  padding: 30px;
}
a {
  background: gray;
  border: solid 1px white;
  color: white;
  font-size: 36px;
  padding: 10px;
  height: 100px;
  text-decoration: none;
  transition: all 500ms ease-in-out;
}
a:hover {
  background: rgba(0,0,255,.3);
  border-color:darksalmon;
  color:darkslategray;
  border-radius: 45px;
}
使用圖形作為背景
若要將圖形當作容器的背景,可以以下方式,請先找一張適合當作背景的圖。<div class="css7_10">這不是一個好範例,因為背景圖案太複雜</div>
.css7_10{
	width: 600px;
	height: 500px;
	color: white;
	font-size: 26px;
	font-weight: bold;
	text-align: center;
	line-height: 500px;
	border: 1px solid blue;
	background-image: url(./images/bg1.jpg);
}
圖形的放置預設值為XY向重複填滿,其他的選擇為加上以下:
- background-repeat: repeat-x;僅X向重複
- background-repeat: repeat-y;僅Y向重複
- background-repeat: no-repeat;沒有重複,僅剩下原圖,再加上以下一行控制圖形位置:
- background-position: left top;
- 原則上位置請使用top、bottom、left、right、center等關鍵字組合來決定位置, 例如:center、bottom right、left等。
-
可以使用background-size來設定圖片的顯示大小,有以下選擇:
- background-size:auto;預設值,原圖片大小
- background-size: width height;給寬高,例如200px 150px, 若是只給一個數字則為寬,高為auto。
- background-size: % %;表示容器長寬的百分比, 若只給一數值表示寬,高為auto。
- background-size: cover; 覆蓋容器,可能會拉伸或切除部分圖形。
- background-size: contain;調整圖形大小使能看到全圖。
- background-size: initial; 設定為原始性質。
- background-size: inherit; 性質繼承自父元件。
.css7_10_1{
	display: inline-block;
	width: 500px;
	height: 500px;
	color: white;
	font-size: 26px;
	font-weight: bold;
	text-align: center;
	line-height: 500px;
	border: 1px solid blue;
	background-image: url(./images/bg1.jpg);
	background-repeat: no-repeat;
	background-size: cover;
}
背景可以包含超過一個圖,例如:
<div style="background-image: url(images/superman1.jpg),url(images/img5.JPG);
background-position:right, left top;
background-repeat:no-repeat, no-repeat;
background-size: auto, cover;
padding:10px;">
<p style="color:yellow;">
Superman was born on the planet Krypton and named Kal-El...
</p>
</div>
Superman was born on the planet Krypton and named Kal-El. As a baby, he was sent to Earth in a small spaceship by his scientist father Jor-El moments before Krypton was destroyed in a natural cataclysm. His ship landed in the American countryside; he was found and adopted by farmers Jonathan and Martha Kent, who named him Clark Kent. Clark displayed various superhuman abilities, such as incredible strength and impervious skin. His foster parents advised him to use his gifts for the benefit of humanity, and he decided to use his powers to fight crime as a vigilante. To protect his privacy, he changes into a colorful costume and uses the alias "Superman" when fighting crime. Clark Kent resides in the fictional American city of Metropolis, where he works as a journalist for the Daily Planet. Superman's love interest is his fellow journalist Lois Lane, and his classic arch-enemy is the genius inventor Lex Luthor. He is a friend of many other superheroes in the DC Universe, such as Batman and Wonder Woman.Superman was born on the planet Krypton and named Kal-El. As a baby, he was sent to Earth in a small spaceship by his scientist father Jor-El moments before Krypton was destroyed in a natural cataclysm. His ship landed in the American countryside; he was found and adopted by farmers Jonathan and Martha Kent, who named him Clark Kent. Clark displayed various superhuman abilities, such as incredible strength and impervious skin. His foster parents advised him to use his gifts for the benefit of humanity, and he decided to use his powers to fight crime as a vigilante. To protect his privacy, he changes into a colorful costume and uses the alias "Superman" when fighting crime. Clark Kent resides in the fictional American city of Metropolis, where he works as a journalist for the Daily Planet. Superman's love interest is his fellow journalist Lois Lane, and his classic arch-enemy is the genius inventor Lex Luthor. He is a friend of many other superheroes in the DC Universe, such as Batman and Wonder Woman.
Superman is a cultural icon of the United States.Superman popularized the superhero genre and defined its conventions, and it remains one of the most lucrative superhero franchises.
Jerry Siegel and Joe Shuster met in 1932 while in high school in Cleveland, and they bonded over their mutual love of movies, pulp fiction magazines, comic strips, and science fiction. Siegel aspired to become a writer and Shuster aspired to become an illustrator. Siegel wrote science fiction stories which he self-published in a magazine called Science Fiction: The Advance Guard of Future Civilization. Shuster often provided illustrations for his work.
要注意的是前面的圖在上方,所以較小的圖要放前面,才不會被蓋住。background-size可以用來控制背景圖的大小,可以給的值有例如:auto、contain、cover、500px 500px、300px等,因為有兩張圖,一樣中間用逗點分開。
hero image
現在我們可以製作如下的效果:<div style="border: 1px solid red;background: url(images/aquaman.jpg) no-repeat center;
background-size:cover;height:1000px;">
<div style="text-align:center; position:relative; top:50%; left:50%; transform: translate(-50%,-50%);">
<h1 style="font-size:3em; color:gold;">Aquaman</h1>
<h2 style="color:lime; margin-bottom:2em;">Arthur Curry</h2>
<button>Learn more</button>
</div>
</div>
Aquaman
Arthur Curry
可以將背景圖放在body成為全頁背景。
使用圖形當作border
使用圖形當作border首先須有一個適合做為border的圖形,可以分為像一個九宮格, 有四角四邊及中間部分,例如以下的圖形。

接著決定切片的數值,以及四邊要重複或拉伸,使用這個指令: border-image: url('./images/borderimage1.png') 30 stretch; stretch是拉伸,round是重複,之前的數值是切片位置,也可以使用百分比。
請看以下css code及其顯示結果:
div.css7_11{
	text-align: center;
	width: 10em;
	height: 8em;
	border: 30px solid transparent;
	padding: 5px 0px 0px 0px;
	border-image: url('./images/borderimage1.png') 60 stretch;
}
看起來效果不怎麼好,再看以下例子:
div.css7_12{
	text-variant: small-caps;
	text-align: justify;
	border: 50px solid transparent;
	padding: 0px 5px;
	border-image: url('./images/borderimage2.png') 45 round;
}
div.css7_13{
	text-variant: small-caps;
	text-align: justify;
	border: 60px solid transparent;
	padding: 10px 0px;
	border-image: url('./images/borderimage3.png') 90 round;
}
div.css7_14{
	text-variant: small-caps;
	text-align: justify;
	border: 70px solid transparent;
	padding: 10px;
	border-image: url('./images/borderimage4.jpg') 40% stretch;
}
相片區
建立一個相片存放區,並可點擊觀賞相片。首先建立以下的相片:<div class="gallery"> <a target="_blank" href="images/img1.jpg"> <img src="images/img1.jpg" width="300" height="200"> </a> <div class="des">Image 1</div> </div> <div class="gallery"> <a target="_blank" href="images/img2.jpg"> <img src="images/img2.jpg" width="300" height="200"> </a> <div class="des">Image 2</div> </div> <div class="gallery"> <a target="_blank" href="images/img3.jpg"> <img src="images/img3.jpg" width="300" height="200"> </a> <div class="des">Image 3</div> </div> <div class="gallery"> <a target="_blank" href="images/img4.jpg"> <img src="images/img4.jpg" width="300" height="200"> </a> <div class="des">Image 4</div> </div> <div class="gallery"> <a target="_blank" href="images/img6.JPG"> <img src="images/img6.JPG" width="300" height="200"> </a> <div class="des">Image 5</div> </div>
每一個div內有一張示意圖(img)與描述內容(div),接著加上以下的CSS:
div.gallery{
	float:left;
	margin:5px;
	border: 1px solid blue;
}
div.des{
	text-align:center;
	padding:10px;
}
div.gallery:hover{
	border:1px solid red;
	opacity:0.5;
}
gallery設定float:left;如此裝著照片的div可一一靠左排列。


object-fit
object-fit是讓我們修改圖片或video如何在其容器內顯示的屬性。有5個選擇,分別是:fill、cover、contain、scale-down、none。以下使用之圖的原始大小為960*540。<div class="gallery"> <a target="_blank" href="images/img1.jpg"> <img src="images/img2.jpg" style="width:200px; height:300px;"> </a> <div class="des">defalt(object-fit:fill;)</div> </div> <div class="gallery"> <a target="_blank" href="images/img2.jpg"> <img src="images/img2.jpg" style="width:200px; height:300px; object-fit:cover;"> </a> <div class="des">object-fit:cover;</div> </div> <div class="gallery"> <a target="_blank" href="images/img2.jpg"> <img src="images/img2.jpg" style="width:200px; height:300px; object-fit:contain;"> </a> <div class="des">object-fit:contain;</div> </div> <div class="gallery"> <a target="_blank" href="images/img2.jpg"> <img src="images/img2.jpg" style="width:200px; height:300px; object-fit:scale-down;"> </a> <div class="des">object-fit:scale-down;</div> </div> <div class="gallery"> <a target="_blank" href="images/img2.jpg"> <img src="images/img2.jpg" style="width:200px; height:300px; object-fit:none;"> </a> <div class="des">object-fit:none;</div> </div>
8. List
List分為ordered跟unordered兩種,做個例子:<ol class="css8_1"> <li>HTML</li> <li>CSS</li> <li>JavaScript</li> <li>Node.js</li> <li>PHP</li> </ol> <br> <ul class="css8_2"> <li>Apple</li> <li>Banana</li> <li>Cat</li> <li>Dog</li> <li>Elephant</li> </ul>
css code:
ol.css8_1{
	list-style-type: upper-alpha;
}

ul.css8_2{
	list-style-type: square;
}
- HTML
- CSS
- JavaScript
- Node.js
- PHP
- Apple
- Banana
- Cat
- Dog
- Elephant
首先可以改變列表前標點的型態,使用list-style-type:upper-roman; 這個語法。
ordered的選擇有
- decimal(default)
- decimal-leading-zero
- lower-roman
- upper-roman
- lower-alpha
- upper-alpha
- lower-greek
- armenian
- cjk-ideographic
- georgian
- hebrew
- hiragana
- hiragana-iroha
- katakana
- katakana-iroha
- none
unordered的選擇有
- disc(default)
- square
- circle
- none
除了使用內定圖形外,可以使用其他圖案。 使用list-style-image: url('filename');語法,例如:
- Apple
- Banana
- Cat
- Dog
- Elephant
ul.css8_5{
	list-style-image: url('./images/itemicon1.jpg');
}
請先行使用軟體將圖修改至合適大小。
此外,若是項目內容文字超過一行,可以使用
- list-style-position: outside;(第二行文字對齊上一行文字)
- list-style-position: inside;(第二行文字對齊項目標號)
使用以下網路資源所提供的icon來增加多變性(可用於list的icon,可設定list-style-type:none):
- Font Awesome Icons:在head加上這一行
<link rel="stylesheet" href="https://cdnjs.cloudflare.com/ajax/libs/font-awesome/4.7.0/css/font-awesome.min.css">然後使用如下語法:<i class="fas fa-cloud" color='grey'></i> <i class="fas fa-heart" color='red'></i> <i class="fas fa-car" color='silver'></i> <i class="fas fa-file"></i> <i class="fas fa-bars"></i> - Google Icons:在head加上這一行
<link rel="stylesheet" href="https://fonts.googleapis.com/icon?family=Material+Icons">然後使用如下語法:<i class="material-icons" style="color:grey;">cloud</i> <i class="material-icons">favorite</i> <i class="material-icons">attachment</i> <i class="material-icons">computer</i> <i class="material-icons">traffic</i>cloud favorite attachment computer traffic
顏色修飾
除了可以修改項目標示之外,文字可以用顏色來修飾,當然背景也可以。例如:<ol class="css8_7"> <li>HTML</li> <li>CSS</li> <li>JavaScript</li> <li>Node.js</li> <li>PHP</li> </ol>
css code:
ol.css8_7{
	list-style-type: georgian;
	background: olive;
	color:white;
	padding: 10px 10px 10px 40px;
}

ol.css8_7 li{
	background: #0f00f0;
	padding-left: 20px;
	margin: 5px;
}
- HTML
- CSS
- JavaScript
- Node.js
- PHP
nth-child() selector
何謂nth-child() selector?在ordered list中,每一個<li></li>可視為其直接後代(child), 為一樹狀結構。我們可以使用nth-child()來選擇後代。舉例說明,一樣使用之前的list。ol.css8_8 li:nth-child(2){
background: #f0a092;
}
- HTML
- CSS
- JavaScript
- Node.js
- PHP
參數除了給數字之外,還可以使用關鍵字odd, even, 或是公式例如3n+1等。 也可以使用first-child或last-child 替換nth-child()來表示第一或最後一個元件。或是使用nth-last-child() 來選擇自後往前算的第n個小孩。 如以下範例:
ol.css8_9 li:nth-child(odd){
	background: #f0a092;
}
- HTML
- CSS
- JavaScript
- Node.js
- PHP
ol.css8_10 li:nth-child(3n+1){
	background: #f0a092;
}
- HTML
- CSS
- JavaScript
- Node.js
- PHP
- Python
- Java
- C++
- Bash
nth-of-type()
<ul>
    <li>a</li>
    <hr>
    <li>b</li>
    <hr>
    <li>c</li>
    <hr>
    <li>d</li>
    <hr>
    <li>e</li>
    <hr>
</ul>
加上如下的CSS:
ul li:nth-child(3){
    background-color: blue;
    font-size: x-large;
    color: red;
}
ul li:nth-of-type(3){
    background-color: orange;
    font-size: x-large;
    color: blue;
}
此時可看出區別。
ol.css8_11 li:first-child{
	background: #f0a092;
}
- HTML
- CSS
- JavaScript
- Node.js
- PHP
- Python
- Java
- C++
- Bash
ol.css8_12 li:nth-last-child(2){
	background: #f0a092;
}
- HTML
- CSS
- JavaScript
- Node.js
- PHP
- Python
- Java
- C++
- Bash
這樣的方式可以不僅用在列表,例如下例:
<div class="css8_13">
	<p>Ant Colony Optimization</p>
	<p>Genetic Algorithm</p>
	<p>Tabu Search</p>
	<p>Particle Search Optimization</p>
	<p>Simulated Annealing</p>
	<p>Harmony-Genetic</p>
</div>
css code:
div.css8_13{
	border: 3px solid blue;
	background: #a0f092;
	padding: 5px 20px;
}

div.css8_13 p:nth-child(even){
	background: #f0a092;
	padding: 3px;
}

div.css8_13 p:nth-child(odd){
	background: #90a0f0;
	padding: 3px;
}
Ant Colony Optimization
Genetic Algorithm
Tabu Search
Particle Search Optimization
Simulated Annealing
Harmony-Genetic
display inline
讓項目(例如li)排成一列(可用於e.g. navigation bar)<ul id="inline"> <li>Home</li> <li>Map</li> <li>About</li> </ul>
#inline>li{
	display: inline;
}
#inline a{
	background:lightgrey;
	padding: 5px;
}
#inline a:hover{
	background: pink;
}
#inline>li:first-child a{
	background: #4caf50;
}
也可以試著使用以下方式建立類似效果,不過此處使用float+display來控制其為一行:
<ul id="inline2">
	<li class="active"><a href="#">Home</a></li>
	<li><a href="#">Map</a></li>
	<li><a href="#">About</a></li>
</ul>
#inline2{
	list-style-type:none;
	overflow: hidden;
	background: #333;
	margin:0;
	padding:0;
}
#inline2>li{
	float: left;
}
#inline2 a{
	display: block;
	padding:10px;
	color: white;
}
#inline2 a:hover:not(.active){
	background: pink;
	color: blue;
}
#inline2 .active{
	background: #4caf50;
}
dropdown menu
要讓list成為下拉式選單,先將元件排列如下:<div class="dropdown"> <button class="about">About</button> <div class="ddcontent"> <ul> <a href="#"><li>Help</li></a> <a href="#"><li>Version</li></a> <a href="#"><li>Copyright</li></a> </ul> </div> </div> <section class="asection"> Something here Something here Something here<br> Something here Something here Something here <br> Something here Something here Something here <br> </section>
加上CSS碼。讓選單內容在hover到dropdown時出現,使用display:block。此時若要讓顯示的選單不要推擠以下的元件,須設定其position: absolute;z-index:99;。
.asection{
    border:2px solid red;
    height: 100px;
    width: 100%;
    background: blue;
}

.dropdown{
    display:inline-block;
}

.ddcontent ul{
    margin:auto;
    padding:0px;
    list-style-type:none;

}
.ddcontent li{
    background: black;
	color:cornsilk;
}

.ddcontent a{
    text-decoration:none;
}

.ddcontent li:hover{
    background: pink;
	color:blue;
}

.about{
    background:lime;
    font-size:1em;
    padding: 5px;
}
.about:hover{
    background:gold;
}
.ddcontent{
    display:none;
    padding:0px;
    margin:0px;
}
.dropdown:hover .ddcontent{
    display:block;
    position: absolute;
    z-index:99;
}
Something here Something here Something here
Something here Something here Something here
做成多個選項選單的例子:MultiLayerMenuAndRandomLogo.html MultiLayerMenu.css
關於z-index
<div class="adiv"></div>
<div class="bdiv"></div>
<div class="cdiv"></div>
div{
	width: 100px;
	height: 100px;
}
.adiv{
	position: absolute;
	top: 0px;
	left: 0px;
	background: red;

}
.bdiv{
	position: absolute;
	top: 10px;
	left: 10px;
	background: green;
	z-index:1;
}
.cdiv{
	position: absolute;
	top: 20px;
	left: 20px;
	background: blue;
}
zIndex.html
自訂編號
自訂編號是把某類型元件加上編號,首先使用counter-reset建立或重置一個counter,然後利用counter-increment定義哪個元件要編號。因為通常要加編號加在元素之前,所以使用pseudo-element before來達成。例如有以下三個h5:<article id="forcounter"> <h4>A</h4> <h4>B</h4> <h4>C</h4> </article>
加上以下的CSS:
#forcounter{
	counter-reset: counternumber 1;
}
#forcounter>h4::before{
	counter-increment: counternumber 2;
	content: "Chapter " counter(counternumber, upper-roman) ": ";
}
- #forcounter是這些元件所在的容器id,可以直接使用body。
- counter-reset是重置一個counter,名稱為number,後面的0是起始值,可以省略,因為初始值就是0。
- counter-increment: number 1;表示每次增加1,這裡1也可以省略,因為初始值為1,若是改為2,表示每次增加2。
- counter(unmber, upper-roman)表示得到number的值。upper-roman若是省略會直接顯示數字,加上ol的list-style-type可以顯示該型態。
A
B
C
若要形成巢狀效果(nested),可以使用如下做法:
<chapter>壹</chapter>
	<asection>A</asection>
		<segment>a</segment>
		<segment>b</segment>
	<asection>B</asection>
		<segment>a</segment>
		<segment>b</segment>
		<segment>c</segment>
<chapter>貳</chapter>
	<asection>A</asection>
		<segment>a</segment>
	<asection>B</asection>
	<asection>C</asection>
		<segment>a</segment>
<chapter>參</chapter>
	<asection>A</asection>
	<asection>B</asection>
		<segment>a</segment>
		<segment>b</segment>
加上以下的CSS:
chapter, asection, segment{
	display:block;
}

asection{
	margin-left: 1em;
}

segment{
	margin-left: 2em;
}

#forcounter2{
	counter-reset: chap;
}

chapter{
	counter-reset: sec;
}

asection{
	counter-reset: seg;
}

chapter::before{
	counter-increment: chap;
	content: counter(chap)": "
}

asection::before{
	counter-increment: sec;
	content: counter(chap)"."counter(sec)": "
}

segment::before{
	counter-increment: seg;
	content: counter(chap)"."counter(sec)"."counter(seg)": "
}
要注意在counter-reset處先是#forcounter2,然後chapter,然後asection如此才行。
9. Table
表格可以改變的屬性為邊界大小顏色與文字對齊等,做個表格舉例說明,內容數字是胡謅的:<table id="css9_1"> <caption>高科大</caption> <tr> <th></th> <th>校區一</th> <th>校區二</th> <th>校區三</th> <th>校區四</th> <th>校區五</th> </tr> <tr> <td>面積</td> <td>100</td> <td>200</td> <td>300</td> <td>400</td> <td>500</td> </tr> <tr> <td>教師數</td> <td>200</td> <td>250</td> <td>300</td> <td>350</td> <td>400</td> </tr> <tr> <td>學生數</td> <td>5000</td> <td>5500</td> <td>6000</td> <td>6500</td> <td>7000</td> </tr> </table>
加上css code:
table#css9_1 th, td, caption{
	border: 1px solid blue;
}
| 校區一 | 校區二 | 校區三 | 校區四 | 校區五 | |
|---|---|---|---|---|---|
| 面積 | 100 | 200 | 300 | 400 | 500 |
| 教師數 | 200 | 250 | 300 | 350 | 400 |
| 學生數 | 5000 | 5500 | 6000 | 6500 | 7000 |
做點修改:
table#css9_2{
	border-collapse: collapse;
}

table#css9_2 th, td, caption{
	border: 1px solid blue;
}
| 校區一 | 校區二 | 校區三 | 校區四 | 校區五 | |
|---|---|---|---|---|---|
| 面積 | 100 | 200 | 300 | 400 | 500 |
| 教師數 | 200 | 250 | 300 | 350 | 400 |
| 學生數 | 5000 | 5500 | 6000 | 6500 | 7000 |
修改寬高及其他色彩並且加上hover:
table#css9_3{
	border: 3px solid #9400d3;
	width: 100%;
	border-collapse: collapse;
}

table#css9_3 th{
	border: 3px solid #9400d3;
	height: 2em;
	color: red;
}
table#css9_3 caption{
	border-left: 3px solid #9400d3;
	border-top: 3px solid #9400d3;
	border-right: 3px solid #9400d3;
	background: olive;
	height: 2em;
	color: #fffaf0;
	padding: 3px 0px;
	font-weight: bold;
}

table#css9_3 td{
	border: 3px solid #9400d3;
	text-align: center;
}

table#css9_3 tr:hover{
	background: blue;
}
| 校區一 | 校區二 | 校區三 | 校區四 | 校區五 | |
|---|---|---|---|---|---|
| 面積 | 100 | 200 | 300 | 400 | 500 |
| 教師數 | 200 | 250 | 300 | 350 | 400 |
| 學生數 | 5000 | 5500 | 6000 | 6500 | 7000 |
nth-child() selector
表格一樣適用nth-child() selector,使用前面範例表格內容,再加上以下的css code:table#css9_4 tr:nth-child(even){
background: #ffe4e1;
}
請注意要加在hover的前面,免得hover的效果被覆蓋了。
| 校區一 | 校區二 | 校區三 | 校區四 | 校區五 | |
|---|---|---|---|---|---|
| 面積 | 100 | 200 | 300 | 400 | 500 |
| 教師數 | 200 | 250 | 300 | 350 | 400 |
| 學生數 | 5000 | 5500 | 6000 | 6500 | 7000 |
Others
CSS補充:- table-layout: fixed (auto); >> 平均(自動)分配欄寬。
- word-wrap : break-word; >> 自動斷行。
- border-spacing: 5px; >> 設定邊框間隙。
- <th rowspan="2"> </th> >> 跨行(colspan="2":跨欄)。
- vertical-align:middle; (top、bottom、middel)。
- responsive:把table置入一個容器(e.g. div)然後給定div的style="overflow-x:auto;"。如此在縮放視窗時會出現x向的scroll bar。
10. Layout
網頁的布局(Layout)形式應該是各憑所好,不過有一些慣用的元件常被使用。例如通常頁面中會有 header, nav, content, sidebar, footer等部位。以下舉例說明,在body標籤內先加上以下code:<header id="header"> <h1>Layout Exercise!</h1> </header> <div> <nav id="nav"> <div class="container"> <a href="">Home</a> <a href="">Service</a> <a href="">Contact</a> <a href="">Help</a> <a href="">About</a> </div> </nav> <section id="sec"> <div class="container"> <p>Say something here......</p> <p>Say something here......</p> <p>Say something here......</p> <p>Say something here......</p> <p>Say something here......</p> <p>Say something here......</p> <p>Say something here......</p> </div> <div class="container"> <p>Say something here 2......</p> <p>Say something here 2......</p> <p>Say something here 2......</p> <p>Say something here 2......</p> <p>Say something here 2......</p> <p>Say something here 2......</p> <p>Say something here 2......</p> <p>Say something here 2......</p> </div> </section> <aside id="sidebar"> <div class="container"> side bar 1 </div> <div class="container"> side bar 2 </div> <div class="container"> side bar 3 </div> <div class="container"> side bar 4 </div> <div class="container"> side bar 5 </div> </aside> <footer id="footer"> <div class="container"> <p>© 2018</p> </div> </footer> </div>
若是想要讓header跟其他元件一樣寬,可以將其加入於main div內。 然後加上css code:
body{
	background: #f1f1f1;
	color: #999;
	margin:0;
}

#header{
	background-color: blue;
	color: #faf300;
	text-align:center;
}

#nav{
	border: 1px solid black;
	background: #0af02a;
	text-align:center;
	margin-bottom: 5px;
}

#footer{
	border: 1px solid red;
	clear: both;
	background: #0af02a;
}

#sec{
	border: 2px solid blue;
	float: left;
	width:70%;
	padding: 10 30px;
	box-sizing: border-box;
}

#sec div{
	background: #8922a2;
	color: #91f8f2;
	padding-top:0px;
	padding-left:5px;
	margin: 0px 5px 5px 5px;
}

#sec div p{
	margin-top: 0px;
	margin-bottom: 3px;
	background: olive;
}

#sidebar{
	border: 1px solid black;
	width: 30%;
	float: right;
	box-sizing: border-box;
}

#sidebar div{
	border: 1px solid green;
	background: black;
	color: white;
	margin-right: 0px;
	margin-bottom: 5px;
}

.main{
	border: 2px solid red;
	width:80%;
	margin:auto;
	overflow:hidden;
}
為了方便看各元件,所以加了許多的邊界,可以將其去除看看效果。其中 box-sizing:border-box;指令的意思是無論怎麼加上border跟padding,元件寬度保持不變, 這可以簡化我們計算寬度的步驟。
另一個要注意的是section要加上float: left;這個意思是section元件靠左,其他物件繞圖。 也就是可以形成文繞圖。而sidebar加上float: right;兩者剛好並列。 而因為footer不是文字,無法文繞圖,為了不影響到footer的顯示,所以在footer內加上clear: both; ,表示清除float元素,因為在其左側,也可以使用clear: left;
結果請看>>>這裡。
Example 2
再看另一個形式,請先建立以下元件於body。這個配置包含header、banner、nav、main section(包含left side bar、sec、right side bar)、footer。
<div class="header">
  <h2>Layout template</h2>
</div>

<div id="banner"></div>

<nav id="nav">
		<a href="">Home</a> |
		<a href="">Service</a> |
		<a href="">Contact</a> |
		<a href="">Help</a> |
		<a href="">About</a> |
</nav>

<div class="main">
	<aside class="sec left" style="background-color:#aaa;">
		<div>
			left side bar 1
			<br><br><br>
		</div>
		<div>
			left side bar 2
			<br><br>
		</div>
		<div>
			left side bar 3
			<br><br><br>
		</div>
	</aside>

	<section class="sec middle" style="background-color:#bbb;">
		<div>
		article 1
		<br><br><br><br><br><br>
		</div>
		<div>
		article 2
		<br><br><br><br><br><br><br><br><br><br><br><br><br><br><br>
		</div>
		<div>
		article 3
		<br><br><br><br><br><br><br><br><br><br><br><br><br><br><br>
		<br><br><br><br><br><br><br><br><br><br><br><br><br><br><br>
		</div>
	</section>

	<aside class="sec right" style="background-color:#ccc;">
		<div>
			right side bar 1
			<br><br>
		</div>
		<div>
			right side bar 2
			<br><br><br>
		</div>
		<div>
			right side bar 3
			<br><br>
		</div>
	</aside>
</div>

<div class="footer">
  <p>Footer</p>
</div>
banner可視需要增刪,通常放個圖。接著加入以下的CSS:
* {
  box-sizing: border-box;
}

.header {
  background-color: #f1f1f1;
  padding: 5px;
  text-align: center;
  font-size: 20px;
}

#banner{
	height:300px;
	background: url(images/bg2.jpg) no-repeat center;
	background-size: cover;
}

#nav{
	background: #faf02a;
	text-align:center;
	margin: auto;
}

.main{
	width:90%;
	margin: auto;
	overflow: hidden;
}

.sec{
  float: left;
  padding: 10px;
  margin-bottom: -10000px;
  padding-bottom: 10000px;
}

.sec.left, .sec.right {
  width: 25%;
  background: pink;
}

.sec.left div, .sec.right div{
  background: cornsilk;
  color: chocolate;
  margin: 5px 5px;

}

.sec.middle {
  width: 50%;
}

.sec.middle div{
	background:green;
	color:red;
	margin: 10px 10px;
	padding: 5px;
}

.main:after {
  content: "";
  display: table;
  clear: both;
}

.footer {
  background-color: lime;
  padding: 10px;
  text-align: center;
  width:90%;
  margin:auto;
}

/* Responsive */
@media (max-width: 800px) {
  .sec.left, .sec.right, .sec.middle {
	width: 100%;
  }
}
- 對所有元件使用box-sizing: border-box;讓大小尺寸不隨padding與margin變化。
- 設定.main與.footer的width:90%;margin:auto;若你想讓nav以下的元件與上面的同寬,則不需要設。
- 讓.sec元件的float:left;要消除之後的效果,之後的元件需要加上clear:both;,此處使用.main:after加上clear:both;來替代。
- 在.main中加上overflow: hidden;,並在.sec中加上margin-bottom: -10000px;padding-bottom: 10000px;(只要大數字即可)可以讓.sec元件的高度與.main等高。若讓背景顏色相同則可忽視。
- 加上@media來實現responsive。在螢幕寬度小於800時,.sec內元件會上下相疊。若考慮此情形,或許不需要設定width:90%。
- 結果請看>>>這裡。
display: flow-root;
<div class="container">
    <aside class="red">red</aside>
    <section class="blue">blue</section>
    <aside class="green">green</aside>
</div>

<footer>Footer</footer>
對應的CSS如下:
*{
    box-sizing: border-box;
}
.container{
  width:80%;
  margin:auto;
  background:#1A85C9;
}
.red{
  width:20%;
  height: 300px;
  background: red;
  float:left;
}
.blue{
  width:60%;
  height: 400px;
  background: blue;
  float:left;
}
.green{
  width:20%;
  height: 800px;
  background: green;
  float:right;
}
footer{
    width:100%;
    height: 200px;
    margin:auto;
    margin-top:10px;
    background-color: blueviolet;
}
要讓container的高度包含內含區塊且footer可以在container下方,已知可以使用clear:both;如下:
.container::after{
    content:"";
    display: block;
    clear:both;
}
現在也可以使用display: flow-root;不過此新功能只支援firfox 53+、chrome58+、opera45+。將container的CSS加上此行即可,如下:
.container{
  width:80%;
  margin:auto;
  background:#1A85C9;
  display: flow-root;
}
Example 3
這個配置包含nav、side bar、main section。其中nav與side bar是fixed。你也可以只選擇side bar,去除nav。<nav> <div> <a href="">Home</a> <a href="">Service</a> <a href="">Contact</a> <a href="">Help</a> <a href="">About</a> </div> </nav> <div class="sidebar"> <a href="#">Link</a> <a href="#">Link</a> <a href="#">Link</a> </div> <div class="content"> <h2>Layout Template</h2> <p>Content <br><br><br><br><br><br><br><br><br><br><br><br><br><br><br><br><br><br> <br><br><br><br><br><br><br><br><br><br><br><br><br><br><br><br><br><br> <br><br><br><br><br><br><br><br><br><br><br><br><br><br><br><br><br><br> <br><br><br><br><br><br><br><br><br><br><br><br><br><br><br><br><br><br> <br><br><br><br><br><br><br><br><br><br><br><br><br><br><br><br><br><br> <br><br><br><br><br><br><br><br><br><br><br><br><br><br><br><br><br><br> </p> </div>加上以下的CSS:
* {
  box-sizing: border-box;
}

body {
  margin: 0;
  font-family: Arial, Helvetica, sans-serif;
}

nav{
	height: 40px;
	background: lightblue;
	position: fixed;
	top:0;
	left:0;
	overflow:hidden;
	width:100%;
	display: inline-block;
	padding:5px;
}

nav div{
	margin:auto;
	text-align:center;
	padding:5px;

}

nav div a{
	font-size:20px;
	text-decoration: none;
	background: blue;
	color: gold;
	padding:5px;
	border-radius:5px;
}

nav div a:hover{
	background: darkred;
	color: silver;
}

.sidebar {
  margin-top:40px;
  height: 100%;
  width: 200px;
  position: fixed;
  z-index: 1;
  top: 0;
  left: 0;
  background-color: black;
  overflow-x: hidden;
}

.sidebar a {
  color: white;
  padding: 16px;
  text-decoration: none;
  display: block;
}

.sidebar a:hover {
  background-color: #ddd;
  color: black;
}

.content {
  background: pink;
  margin-top: 30px;
  margin-left: 200px;
  padding: 5px 20px;
}
讓sidebar與的navposition: fixed;來固定其位置。請自行調整各部位大小。結果請看>>>這裡。
Example 4
這個例子首先使用image as background製造一個banner,之後加上一個nav,在之後加上一個gallery(使用display:flex),在之後加上一個介紹(包含文字與圖形),最後加上footer。結果請看>>>這裡。More Examples
11. Grid
Grid是將一個容器內的元件布置做網格狀布置,關鍵字為 display: grid(or inline-grid);然後用 grid-template-columns,來設定欄數。 直接看以下例子:<div class="css11_1"> <div>A</div> <div>B</div> <div>C</div> <div>D</div> <div>E</div> <div>F</div> </div>
加上css code:
<
div.css11_1{
	display: grid;
	grid-template-columns: auto auto;
	padding: 10px;
}

div.css11_1 > div{
	background: orange;
	border: 1px solid black;
	color: white;
	font-size: 20px;
	text-align: center;
	padding: 20px;
	margin: 5px;
}
上面css code內的grid-template-columns: auto auto;表示會有兩欄,而 div.css11_1 > div中的>符號表示只作用於子代,而不作用於之後的後代。 顯示結果如下:
上例中我們使用margin: 5px;來讓各區塊看起來分開,我們可以使用 gird的grid-column-gap方法更方便的分隔兩欄。如下例在css code中 加上grid-column-gap: 50px;。 (margin: 5px;去除)的顯示結果。
顯然也可以使用grid-row-gap來加上行的間距。再加上 grid-row-gap: 10px; 的顯示結果:
行欄(row column)的間距設定可以簡寫為: grid-gap: 10px 50px; 若是僅給一個數值表示row column的間距相同。
跨度
元件可以跨越欄或是行,加大跨度,只要使用 grid-column(row)-start及grid-column(row)-end; 來設定即可,如下例:div.css11_4{
display: grid;
grid-template-columns: auto auto;
padding: 10px;
grid-column-gap: 50px;
grid-row-gap: 10px;
}
div.css11_4 > div{
background: orange;
border: 1px solid black;
color: white;
font-size: 20px;
text-align: center;
padding: 20px;
}
div.css11_4 > div:first-child{
color:red;
background: #1E90FF;
grid-column-start: 1;
grid-column-end: 3;
}
請注意因為要橫跨兩欄,所以要止於第三欄,所以寫
grid-column-end: 3;
跨行就類似了,使用 grid-row-start:1;及grid-row-end:3;
顯示如下:
接下來將兩者合而為一,顯示如下:
css提供另一個簡易的寫法,就是使用grid-column:1/3;(或寫grid-column:1/ span 2;)來代替grid-column-start:1;及grid-column-end:3;類似的方式可以使用grid-row:1/3;(或寫grid-row:1/ span 2;)來代替grid-row-start:1;及grid-row-end:3;當合二為一時,可以直接加入兩行,也可以簡寫為grid-area:1/1/3/3;(或寫1/1/span 2/3;)來替換,其中前兩個數字是row/column的起始位置,後兩個是結束位置。
網格調整
在之前的例子中使用grid-template-columns: auto auto;來平分欄寬,若是欄寬 並不均寬,則可以直接給數值。例如使用前例,先去除跨度,將 grid-template-columns: auto auto auto;改為 grid-template-columns: 100px auto 250px; css code如下:div.css11_7{
display: grid;
grid-template-columns: 100px auto 250px;
padding: 10px;
grid-column-gap: 50px;
grid-row-gap: 10px;
}
div.css11_7 > div{
background: orange;
border: 1px solid black;
color: white;
font-size: 20px;
text-align: center;
padding: 20px;
}
顯示結果如下:
也可以更改行高,加上 grid-template-rows: 100px 250px; 這行再看結果如下:
另一個方式是使用justify-content屬性來調整網格,有以下參數可使用:
- justify-content: space-evenly; 平分欄空間
- justify-content: space-around; 欄兩側空間相同(類似有margin)
- justify-content: space-between;平分欄空間,但兩邊欄位靠兩側
- justify-content: center; 欄位置中
- justify-content: start; 欄位靠開始端(左)
- justify-content: end; 欄位靠結束端(右)
css code與顯示如下:
div.css11_9{
	display: grid;
	justify-content: space-evenly; /*space-evenly, space-around, space-between, center, start, end*/
	grid-template-columns: 100px 100px 100px;
	grid-template-rows: 100px 250px;
	padding: 10px;
	grid-column-gap: 50px;
	grid-row-gap: 10px;
	background: springgreen;
	border: 1px solid red;
}

div.css11_9 > div{
	background: orange;
	border: 1px solid black;
	color: white;
	font-size: 20px;
	text-align: center;
	padding: 20px;
垂直向也可以調整,使用align-content 屬性,所用參數與justify-content相同,例如將上例的容器加上高度(400px), 然後調整元件的尺寸,再加上align-content屬性,code與顯示如下:
div.css11_10{
	display: grid;
	height: 400px;
	justify-content: space-evenly; /*space-evenly, space-around, space-between, center, start, end*/
	align-content: center; /*space-evenly, space-around, space-between, center, start, end*/
	grid-template-columns: 100px 100px 100px;
	grid-template-rows: 100px 100px;
	padding: 10px;
	grid-column-gap: 50px;
	grid-row-gap: 10px;
	background: springgreen;
	border: 1px solid red;
}

div.css11_10 > div{
	background: orange;
	border: 1px solid black;
	color: white;
	font-size: 20px;
	text-align: center;
	padding: 20px;
}
另一個分割方式為使用fr(fractional unit),先將欄位切為數個碎片,再看每一欄 占多少寬度。舉例如下:
div.css11_11{
	display: grid;
	grid-template-columns: 1fr 2fr 1fr;
	grid-template-rows: 1fr 3fr;
	padding: 10px;
	grid-column-gap: 50px;
	grid-row-gap: 10px;
	background: springgreen;
	border: 1px solid red;
}

div.css11_11 > div{
	background: orange;
	border: 1px solid black;
	color: white;
	font-size: 20px;
	text-align: center;
	padding: 20px;
}
也可以使用以下寫法:
grid-template-columns: 1fr 2fr 100px;
grid-template-columns: 1fr 100px 2fr 10%;
區塊命名
可以採用對區塊命名的方式來控制其配置,需使用 grid-area: 名稱;屬性來達成。舉例說明如下:div.css11_12{
display: grid;
padding: 10px;
grid-column-gap: 50px;
grid-row-gap: 10px;
background: springgreen;
border: 1px solid red;
grid-template-columns: repeat(3, 1fr);
grid-template-rows: repeat(2, 1fr);
grid-template-areas:'a a';
}
div.css11_12 > div{
background: orange;
border: 1px solid black;
color: white;
font-size: 20px;
text-align: center;
padding: 20px;
}
div.css11_12 > div:first-child{
grid-area: a;
}
根據上面的css code,首先我們將first-child命名為a。然後將它的範圍定義為
grid-template-areas:'a a';
表示a區塊佔據前兩欄。此外repeat(3, 1fr)是1fr 1fr 1fr的另一個寫法。
上例中grid-template有三行,也可以合併寫為如下: grid-template-areas:'a a .';一點代表一欄,例如要做5欄,可以使用
grid-template-areas:'a a . . .';
例如:
如果跨度包含欄跟行,那麼使用如下語法:
grid-template-areas:'a a . . .' 'a a . . .';
顯示如下:
我們可以將每一區塊都命名,然後放在任何位置上。例如:
div.css11_15{
	display: grid;
	padding: 10px;
	grid-column-gap: 50px;
	grid-row-gap: 10px;
	background: springgreen;
	border: 1px solid red;
	grid-template-columns: repeat(3, fr);
}

div.css11_15 > div{
	background: orange;
	border: 1px solid black;
	color: white;
	font-size: 20px;
	text-align: center;
	padding: 20px;
}

div.css11_15 > div:first-child{
	grid-area: 1/3/2/4;
}
div.css11_15 > div:nth-child(2){
	grid-area: 1/2/2/3;
	background: red;
}
div.css11_15 > div:nth-child(3){
	grid-area: 1/1/2/2;
}
div.css11_15 > div:nth-child(4){
	grid-area: 2/3/3/4;
}
div.css11_15 > div:nth-child(5){
	grid-area: 2/2/3/3;
}
div.css11_15 > div:last-child{
	grid-area: 2/1/3/2;
}
使用區塊B來說明,它的位置在1/2/2/3,前兩個數字是起始行欄(row column) ,後兩個數字是結束行欄。
Layout
你應該早就猜想到可以使用Grid來做版面配置,以下為一簡單範例:<div class="css11_16"> <div id="header">Header here</div> <div id="nav">nav here</div> <div id="leftbar">leftbar here</div> <div id="rightbar">rightbar here</div> <div id="content">content here</div> <div id="footer">footer here</div> </div>
加上css code:
<
div.css11_16 > div{
	border: 1px solid blue;
	padding: 20px;
	font-size: 20px;
	font-weight: bolder;
	text-align: center;
	margin:2px;
}

div.css11_16 #header{
	grid-area: header;
	background: blue;
	color:gold;
}

div.css11_16 #nav{
	grid-area: nav;
	background: black;
	color: white;
}

div.css11_16 #leftbar{
	grid-area: leftbar;
	height: 500px;
	background: pink;
}

div.css11_16 #rightbar{
	grid-area: rightbar;
	background: pink;
}

div.css11_16 #content{
	grid-area: content;
	background: tan;
}

div.css11_16 #footer{
	grid-area: footer;
	background: green;
	padding: 10px;
	text-align: center;
}

div.css11_16{
	display: grid;
	/*grid-template-columns: repeat(5, 1fr);*/
	grid-template-areas:
	'header header header header header header'
	'nav nav nav nav nav nav'
	'leftbar content content content content rightbar'
	'footer footer footer footer footer footer'	;
}
css code中leftbar內之height: 500px;在真實使用時應去除,此處是為了讓這一行看起來長一點好看用的。 顯示結果如下,看起來比之前一章的方法來得簡潔有效得多了。
Responsive Layout
HTML:<body>
<header>Responsive</header>
<nav><a href="#">do</a><a href="#">re</a><a href="#">mi</a></nav>
<h2>Articles</h2>
<main>
<article>
<h3>article 1</h3>
</article>
<article>
<h3>article 2</h3>
</article>
<article>
<h3>article 3</h3>
</article>
<article>
<h3>article 4</h3>
</article>
<article>
<h3>article 5</h3>
</article>
<article>
<h3>article 6</h3>
</article>
</main>
</body>
先設計窄螢幕,在@media內設計寬螢幕:
*{
    box-sizing: border-box;
}
body{
  height: 100vh;
  width: 100vw;
  position: absolute;
  display: grid;

  grid-template-columns: 1fr;
  grid-template-rows: 4rem auto auto 3rem;
  grid-template-areas:
    "header"
    "title"
    "main"
    "nav";
}

header{
  background-color: rgba(0,0,0,.1);
  grid-area: header;
  text-align: center;
  font-size: 5rem;
}

nav{
  background-color:chocolate;
  grid-area: nav;
  text-align: center;
}

nav a{
  color:snow;
  padding: 1rem;
}

h2{
  background-color: darkblue;
  color:aliceblue;
  grid-area: title;
  padding: .5rem 1rem;
}

main{
  padding: 1rem;
  grid-area: main;
  overflow: auto;
}

article{
  background-color: darkslategray;
  border-left: solid 2.5rem grey;
  padding: 1rem;
  margin-bottom: 1rem;
}
/* 超過500px時,亦即非手機螢幕 */
@media (min-width: 500px){
  body{
    height: auto;
    grid-template-columns: 1fr;
    grid-template-rows: auto auto auto;
    grid-template-areas:
      "header"
      "nav"
      "title"
      "main";
  }
  main{
    column-width: 250px;
  }
  article{
    break-inside: avoid;
  }
  h2{
    background:burlywood;
    color:black;
  }
}
12. Flexbox
Flex也是配置在一個容器內的元件之方法,需使用關鍵字 display: flex;來實現。首先先設計html元件如下:<div class="css12_1"> <div>A</div> <div>B</div> <div>C</div> <div>D</div> <div>E</div> <div>F</div> </div>
flex-direction
在使用flex時,首先可以控制其流動方向,使用 flex-direction關鍵字,有以下選擇:- flex-direction: column; 由上往下
- flex-direction: column-reverse; 由下往上
- flex-direction: row; 由左往右
- flex-direction: row-reverse; 由右往左
div.css12_1{
	display: flex;
	flex-direction: row-reverse;
	background: #f1f1f1;
	border: 1px solid blue;
}

div.css12_1 > div{
	background: pink;
	font-size: 20px;
	font-weight: bolder;
	padding: 20px;
	margin: 5px;
	border: 1px solid green;
}
flex-wrap
接下來介紹flex-wrap屬性,這是關於容器中元件超過容器寬度時的處理, 在縮放視窗時會用到。有以下幾種選擇:- flex-wrap: nowrap; 不換行(預設值)
- flex-direction: wrap; 換行
- flex-direction: wrap-reverse; 由下往上換行
- flex-flow: row wrap; 換行
div.css12_2{
	display: flex;
	flex-wrap: wrap;
	background: #f1f1f1;
	border: 1px solid blue;
	width:50%;
}
顯示結果如下:試著縮放視窗看其變化。
justify-content
跟Grid類似,Flex也有justify-content屬性,相關參數如下:- justify-content: flex-start; 靠容器開始端(預設值)
- justify-content: flex-end; 靠容器結束端
- justify-content: center; 置中
- justify-content: space-around; 元件兩端都有空間
- justify-content: space-between; 平分空間,與容器沒有間隙
原則上與Grid的justify-content類似。在第一例中加上 justify-content: space-around; 這行,顯示結果如下:
align-items
在垂直向對齊則使用align-items屬性,可選擇的參數有:- align-items: stretch; (預設值)
- align-items: center;
- align-items: baseline;
- align-items: flex-start;
- align-items: flext-end;
修改css code如下:
div.css12_4{
	display: flex;
	flex-direction: row;
	justify-content: space-around;
	align-items: center;
	background: #f1f1f1;
	border: 1px solid blue;
	height: 500px;
}

div.css12_4 > div{
	background: pink;
	font-size: 20px;
	font-weight: bolder;
	padding: 20px;
	margin: 5px;
	border: 1px solid green;
	width: 1em;
}
我們調整個別元件的height,可以看到元件都根據中點置中了。
align-content
align-content是調整的是垂直向多行對齊。可用的參數有:- align-content: stretch; (預設值) 拉伸填滿
- align-content: space-between; 平分空間,靠兩端
- align-content: space-around; 元件兩端有平分空間
- align-content: center; 置中
- align-content: flex-start; 靠開始端
- align-content: flext-end; 靠結束端
舉例如下,為了較好顯示,容器內元件增加到12個。
div.css12_5{
	display: flex;
	background: #f1f1f1;
	border: 1px solid blue;
	height: 500px;
	width: 600px;
	flex-wrap: wrap;
	align-content: space-around;
}

div.css12_5 > div{
	box-sizing: border-sizing;
	background: pink;
	font-size: 20px;
	font-weight: bolder;
	border: 1px solid green;
	margin: 10px;
	min-width: 100px;
	min-height: 100px;
}
結果顯示如下:
關於容器內元件
容器內的元件也包含數個屬性可以用於調整。order 屬性
我們可以直接調整其順序,例如以下之html 與 css code:<div class="css12_6"> <div class="css12_6a">A</div> <div class="css12_6b">B</div> <div class="css12_6c">C</div> <div class="css12_6d">D</div> <div class="css12_6e">E</div> <div class="css12_6f">F</div> </div>
div.css12_6{
	display: flex;
	align-content: stretch;
	background: #f1f1f1;
	border: 1px solid blue;
}

div.css12_6 > div{
	box-sizing: border-sizing;
	background: pink;
	font-size: 20px;
	font-weight: bolder;
	border: 1px solid green;
	margin: 10px;
	min-width: 100px;
	min-height: 100px;
	text-align: center;
	line-height: 100px;
}

.css12_6a{
	order: 3;
}

.css12_6b{
	order: 5;
}

.css12_6c{
	order: 2;
}

.css12_6d{
	order: 6;
}
.css12_6e{
	order: 4;
}

.css12_6f{
	order: 1;
}
flex
flex包含flex-grow, flex-shrink, flex-basis這三個屬性可用來控制容器內元件的尺寸, 以下分別舉例說明。flex-grow
div.css12_7{
	display: flex;
	align-items: stretch;
	background: #f1f1f1;
	border: 1px solid blue;
}

div.css12_7 > div{
	box-sizing: border-sizing;
	background: pink;
	font-size: 20px;
	font-weight: bolder;
	border: 1px solid green;
	margin: 5px;
	width: 100px;
	text-align: center;
}

div.css12_7 div:first-child{
	flex-grow: 0;
}

div.css12_7 div:nth-child(2){
	flex-grow: 5;
}

div.css12_7 div:last-child{
	flex-grow: 1;
}
flex-grow: 0;表示寬度不伸展,數字越大表示分配到更多多餘空間。
flex-shrink
顧名思義是收縮,以下範例說明。div.css12_8{
display: flex;
align-items: stretch;
background: #f1f1f1;
border: 1px solid blue;
}
div.css12_8 > div{
box-sizing: border-sizing;
background: pink;
font-size: 20px;
font-weight: bolder;
border: 1px solid green;
margin: 5px;
width: 200px;
text-align: center;
}
div.css12_8 div:nth-child(2){
flex-shrink: 0;
}
div.css12_8 div:nth-child(5){
flex-shrink: 0;
}
div.css12_8 div:last-child{
flex-shrink: 3;
}
此例中因為元件(200px)總寬度超過容器總寬度,所以元件會自然收縮,但是第2,5元件 收縮率為0,所以保持原大小,最後一個收縮率為3,所以變更小,預設值為1。
flex-basis
flex-basis表示設定元件至特定大小。 例如:div.css12_9{
display: flex;
background: #f1f1f1;
border: 1px solid blue;
}
div.css12_9 > div{
box-sizing: border-sizing;
background: pink;
font-size: 20px;
font-weight: bolder;
border: 1px solid green;
margin: 5px;
width: 100px;
text-align: center;
}
div.css12_9 div:nth-child(2){
flex-basis: 50px;
}
div.css12_9 div:nth-child(3){
flex-basis: 200px;
}
div.css12_9 div:last-child{
flex-grow: 2;
}
此例中讓第2及3元件的寬度分別為50及200px,並讓最後一個元件grow, 因此顯示以下結果。
以上三屬性可合併簡寫為例如flex: 0 0 50px;分別表示grow, shrink, and basis。 如下例:
div.css12_10{
	display: flex;
	background: #f1f1f1;
	border: 1px solid blue;
}

div.css12_10 > div{
	box-sizing: border-sizing;
	background: pink;
	font-size: 20px;
	font-weight: bolder;
	border: 1px solid green;
	margin: 5px;
	width: 100px;
	text-align: center;
}

div.css12_10 div:nth-child(2){
	flex: 0 0 50px;
}

div.css12_10 div:nth-child(3){
	flex: 2 0 0px;
}

div.css12_10 div:last-child{
	flex: 0 3 0px;
}
用flex實現layout
很顯然flex可以幫助我們layout,與grid有類似的效果,接下來看以下例子:<div class="css12_11_header">Header</div> <div class="css12_11_nav">Nav Bar</div> <div class="css12_11_main"> <div class="css12_11_left">Left Bar</div> <div class="css12_11_content">Content</div> <div class="css12_11_right">Right Bar</div> </div> <div class="css12_11_footer">Footer</div>
div.css12_11_header{
	background: blue;
	color: gold;
	padding: 20px;
	text-align: center;
}

div.css12_11_nav{
	background: white;
	color: black;
	text-align: center;
}


div.css12_11_left{
	background: olive;
	color: yellow;
	margin: 0px;
	text-align: center;
	flex: 1;
}

div.css12_11_content{
	background: tomato;
	color: lime;
	margin: 0px;
	min-Height: 300px;
	text-align: center;
	flex-grow: 3;
}

div.css12_11_right{
	background: #99f5f8;
	color: red;
	margin: 0px;
	text-align: center;
	flex: 1;
}

div.css12_11_footer{
	background: green;
	color: white;
	text-align: center;
}

div.css12_11_main{
	display: flex;
	flex-direction: row;
	justify-content: space-between;

}
顯示如下:
加上伸縮bar的例子 | 另一個加上伸縮bar的例子
使用flex貼上圖片
<img src="./images/img2.jpg" width="30%" height = "30%" />
<img src="./images/img3.jpg" width="30%" height = "30%" />
<img src="./images/img4.jpg" width="30%" height = "30%" />
<img src="./images/img1.jpg" width="30%" height = "30%" />
<img src="./images/img5.jpg" width="30%" height = "30%" />
<img src="./images/img6.jpg" width="30%" height = "30%" />
<img src="./images/img7.jpg" width="30%" height = "30%" />
<img src="./images/img8.jpg" width="30%" height = "30%" />
<img src="./images/img9.JPG" width="30%" height = "30%" />
div.css12_12{
	display:flex;
	flex-wrap: wrap;
	justify-content: center;
}


13. 動畫
之前介紹的transition應也算是動畫的一部分,此處介紹另一製作方式: 使用keyframes。 display: flex;來實現。主要流程如下,前面四項必須給定:- animation-name: 命名欲成為動畫的物件,這樣才知道要作用在那個物件身上
- animation-duration: 確認動畫作用時間,例如5s。
- 給元件初始狀態: 例如background: blue 或 position: relative。
- from, to, %: 給每個階段的狀態,from=0%, to=100%
- animation-delay: 設定delay時間,也就是經過幾秒才開始動畫。 如果給的時間是負數,例如-2s,表示從2s時間開始動畫。
- animation-iteration-count: 動畫重複次數,infinite表示無限循環
- animation-direction: 設定動畫方向,可用參數如下:
- normal: 正常方向
- reverse: 反向
- alternate: 先正向再反向
- alternate-reverse: 先反向再正向
- animation-timing-function: 給時間函數,可用參數如下:
- ease: 開始結束慢,中間快(預設值)
- linear: 均速
- ease-in: 開始慢
- ease-out: 結束慢
- ease-in-out: 開始結束慢
- cubic-bezier(n,n,n,n): 自定義速度
- animation: name duration timefunction delay iteration direction: 簡寫
<div class="css13_1"></div>
div.css13_1{
	width: 100px;
	height: 100px;
	animation-name: div13_1; /*給名字*/
	animation-duration: 4s; /*給時間*/
	background: green; /*給初始狀態*/
	position: relative; /*給初始狀態*/
	animation-delay: 0.5s; /*給延緩時間(optional)*/
	animation-iteration-count: infinite; /*給重複次數(optional)*/
	animation-direction: alternate; /*給動畫方向(optional)*/
	animation-timing-function: ease-in-out; /*給動畫速度(optional)*/

}

@keyframes div13_1{
	/*給各階段狀態*/
	from { /*0%*/
		background: green;
		left: 0px;
	}
	25% {
		background: orange;
		left: 100px;
	}
	50% {
		background: blue;
		left: 200px;
	}
	75% {
		background: red;
		left: 300px;
	}
	to { /*100%*/
		background: yellow;
		left: 400px;
	}
}
Steps function
steps(number, position:key words start、end、jump-start、jump-end)或step(number, position:jump-none、jump-both) function可以將動畫時間等分,成為固定數量的step。例如以下的HTML:<div class="pinocchio">pinocchio</div>
對應的CSS:
@keyframes stretch {
    0% {
        width: 0;
        background-color: white;
        border: 2px solid #a9080d;
    }
    100% {
        width: 90vw;
        background-color: rgb(21, 36, 242);
        border: 2px solid a9080d;
    }
}

.pinocchio {
    animation-name: stretch;
    animation-duration: 5s;
    animation-iteration-count: infinite;
    border-radius: 0% 40% 40% 0%;
    padding: 5px;
    color: tomato;
    font-size:x-large;
    animation-timing-function: steps(120, end);
}
Animation Button
<a href="http://www.nkust.edu.tw"><button class="animations">NKUST</button></a>
<a href="http://www.google.com"><button class="animations">Google</button></a>
CSS:
@keyframes aniButton {
0% {
background: gray;
border-color: white;
color: white;
border-radius: 0px;
transform: scale(0);
}
25% {
transform: rotate(5deg) scale(.25);
}
50% {
transform: rotate(-10deg) scale(.5);
}
75% {
transform: rotate(35deg) scale(.75);
}
100% {
background: black;
border-color: gray;
color: snow;
border-radius: 45px;
transform: rotate(0) scale(1);
}
}
.animations {
animation: aniButton 500ms ease-in-out 1;
background: black;
border: solid 1px gray;
border-radius: 45px;
color: snow;
font-size: 2rem;
padding: 1rem;
text-align: center;
margin: 50px 10px;
width: 5em;
}
.animations:hover{
cursor: pointer;
}
也可以讓其旋轉:
@keyframes aniButton {
0% {
background: gray;
border-color: white;
color: white;
border-radius: 0px;
transform: scale(0);
}
10% {
transform: rotate(36deg) scale(.1);
}
20% {
transform: rotate(72deg) scale(.2);
}
30% {
transform: rotate(108deg) scale(.3);
}
40% {
transform: rotate(144deg) scale(.4);
}
50% {
transform: rotate(180deg) scale(.5);
}
60% {
transform: rotate(216deg) scale(.6);
}
70% {
transform: rotate(252deg) scale(.7);
}
80% {
transform: rotate(288deg) scale(.8);
}
90% {
transform: rotate(324deg) scale(.9);
}
100% {
background: black;
border-color: gray;
color: snow;
border-radius: 45px;
transform: rotate(360deg) scale(1);
}
}
.animations {
animation: aniButton 500ms ease-in-out 1;
background: black;
border: solid 1px gray;
border-radius: 45px;
color: snow;
font-size: 2rem;
padding: 1rem;
text-align: center;
margin: 50px 10px;
width: 5em;
}
.animations:hover{
cursor: pointer;
}
使用steps function
@keyframes aniButton {
0% {
background: gray;
border-color: white;
color: white;
border-radius: 0px;
transform: rotate(0deg) scale(0);
}
100% {
background: black;
border-color: gray;
color: snow;
border-radius: 45px;
transform: rotate(360deg) scale(1);
}
}
.animations {
animation: aniButton 2s ease-in-out 1;
background: black;
border: solid 1px gray;
border-radius: 45px;
color: snow;
font-size: 2rem;
padding: 1rem;
text-align: center;
margin: 50px 10px;
width: 5em;
animation-timing-function: steps(6, start);
}
.animations:hover{
cursor: pointer;
}
14. Form
Form的建立請見HTML的Form,在此僅介紹一些CSS在Form上的應用。Input Fields
- 針對輸入元件
#inputfield input{
background: lightgrey;
}
#inputfield input[type=url]{
width: 100%;
}
#inputfield input[type=text]{
border: none;
border-bottom: 2px solid red;
margin-bottom: 2px;
}
#inputfield input[type=tel]:focus{
background: lightgreen;
}
#inputfield input[type=email]{
background-image: url(images/itemicon1.jpg);
background-position: 1px 1px;
background-repeat: no-repeat;
}
#inputfield input[type=submit], #inputfield input[type=reset]{
background: pink;
color: blue;
padding:2px;
margin:10px 0px 10px 0px;
border: 2px solid red;
border-radius: 5px;
box-sizing: border-box;
}
- 使用input會影響所有input,若使用input[type=text]則僅影響text。
Search
- search輸入框
#search input[type=search]{
-webkit-transition: width 0.5s ease-in-out;
transition: width 0.5s ease-in-out;
}
#search input[type=search]:focus{
width: 100%;
background: lime;
}
- 使用-webkit-transition與transition建立動態效果。
Responsive Form
- 建立Responsive Form
@media(max-width: 1000px) {
body{
display: flex;
flex-direction: column;
background: blue;
}
.sidebar{
background: green;
}
input{
background:gold;
margin-top:0;
}
.main, input[type=submit]{
width=100%;
}
}
- 當螢幕寬度小於600px的變化。